Patron Record
The Patron Record workform in Leap includes header information and various views. You can click the REGISTRATION button to view or update patron information.
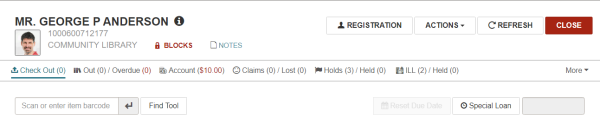
Patron Record Workform Header
The Patron Record workform header information is displayed for every view of the patron record.
It includes the patron's name, barcode, and the branch where the patron is registered; an information icon; links to BLOCKS and NOTES views; a REGISTRATION button you can click to go to the patron's registration information; an ACTIONS button and menu; and REFRESH and CLOSE buttons.
You can click  to open the PATRON INFO pop-up window that displays the patron code, home address, phone number, email address, registration expiration date, and notification preference. Additional user-defined fields (UDFs) appear in this box if they are selected for display in the patron services parameter Check-out: Optional patron data. The following additional fields do not appear in this box even if the parameter is set to display them: eReceipt option, Address check date, Birthdate, Last activity date, Phone 2, Phone 3, Registered branch, and Statistical class.
A tabbed summary bar displays the number of items out and overdue; the account balance; the number of claimed and lost items; the number of hold requests and held items; and the number of ILL requests and held ILL items. You can click a tab to see details.
You can go to different views by selecting one of the following options on the More menu: Reading History, Associations, Notices, Messages, Blocks, Notes, Record Sets.
Note:
The More menu includes the ILL view if the Patron Record workform is displayed in a narrower window.
Patron Record - Registration View
To create a new patron record, click the NEW PATRON button or select New | Patron record. The Patron Registration view of the patron's record appears.
This view also appears when you click the REGISTRATION button on an existing patron's record. Use the navigation menu along the left of the workform to move to specific sections of the patron's registration information.
From this view, you can:
- Update the patron's registration
- Reset a patron password
- Renew a patron's registration
- Copy registration information to another patron's record
- Merge the patron record with another patron's record
- Secure (or release) the patron record
- Delete the patron record

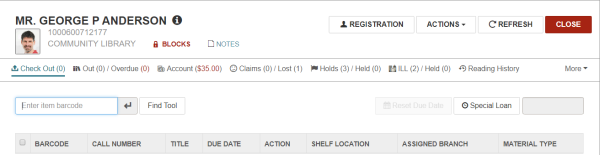
Patron Record - Check Out View
When you open an existing patron record, the Check Out view appears where you can check out items to the patron.
Note:
The ILL/Held option may be under the More menu if you are viewing Leap in a narrower window or screen.
You can go to a different view by clicking one of the following tabs: Out/Overdue, Account, Claims/Lost, Holds/Held, ILL/Held.
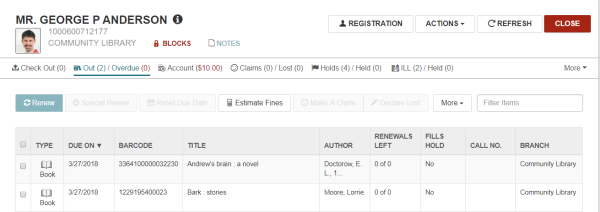
Patron Record - Out/Overdue View
The Out/Overdue view displays the items that are checked out to the patron and the items overdue. The TYPE column displays the item type and the material type icon. The Due On column displays the due date with an exclamation point if the item is overdue. The RENEWALS LEFT column indicates the number of renewals and the total number of renewals. If the item can fill a hold request, a Yes appears in the Fills Hold column.
Depending on the width of the application view, some actions may appear under the More menu instead of in the button bar.
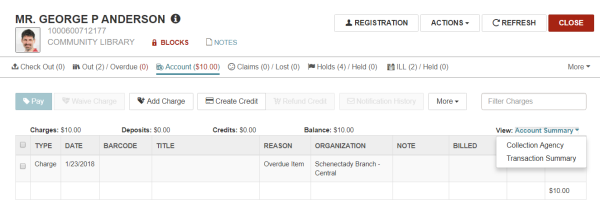
Patron Record - Account View
The columns in the Account list display the type of charge, credit, or deposit; the date; the item barcode and title (if applicable); the reason for the charge, credit or deposit; the organization that made the financial transaction; notes (if entered); and the amount. When you choose a specific line in the Account list, the applicable task buttons are active. For example, when you choose a credit, the Refund Credit button is active.
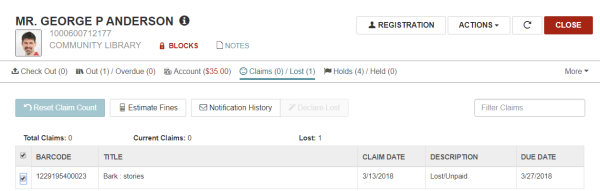
Patron Record - Claims/Lost View
If the patron has claimed items or declared items lost, the items are listed in the patron's record when you select Claims/Lost. The first number indicates the number of claimed items and the second number indicates the number of items that were declared lost.
From the Claims/Lost list, you can: reset the patron's total claim count; estimate fines (if your library has opted to include claimed items in estimated fines); and view the notification history for a claim.
Patron Record - Holds/Held View
Click the Holds/Held tab on the Patron workform to see a list of patron hold requests and held items.
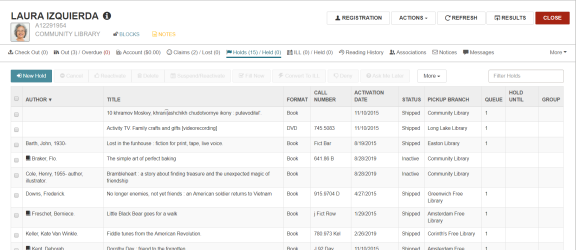
You can place a single hold request or multiple hold requests for the patron from this view by clicking New Hold.
When you select the check box corresponding to a hold request in the list, you can perform the following actions, if the button or option is available:
- Cancel
- Reactivate
- Delete
- Suspend/Reactivate
- Fill Now
- Convert to ILL
- Deny
- Ask Me Later
You can also select the following options (if available for the selected hold requests) from the More menu:
- Return
- Add to Group
- Remove from Group
- Multiple Holds
You can go to the Hold Request workform by clicking anywhere on a list entry.
Note:
Depending on the width of the application view, some action buttons may appear under the More menu instead of in the button bar.
When you access a locked hold request, a message indicates the record is being modified by another user. You can click the LOCKED indicator to display the locked information.
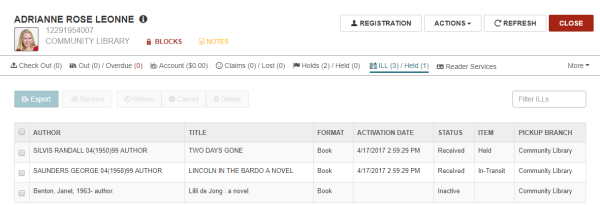
Patron Record - Interlibrary Loan (ILL) Requests View
To view a patron’s interlibrary loan (ILL) holds summary:
- Open the patron's record.
-
Select ILL/Held.
The ILL/Held view shows a list of ILL holds for the patron with each item's status and pickup branch.
Patron Record - Reader Services View
From the Reader Services View, you can enable Outreach Services for a patron, enter the patron's preferences, and set delivery options. You can use the Selection list button to open the Outreach Services Workform, which allows you to create and work with the patron's picklist.

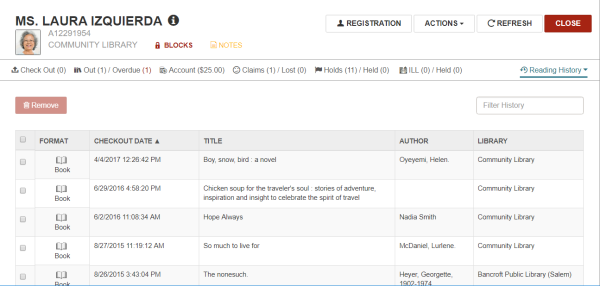
Patron Record - Reading History View
If your library maintains reading histories, and the option Maintain Reading History is selected in the Patron Record | Registration view, the patron's reading history appears. From this view, you can filter the list by typing in the Filter History box; select a check box next to a title, and click Remove to remove it; or click a title entry to go to the bibliographic record.
Patron Record - Associations View
If the patron has any associations established with other patrons (such as family members), the Associations view displays a list when you select Associations from the More menu in the patron record. From this view, you can: add a new associated patron; go to the associated patron's record; edit a patron association; or delete an association.

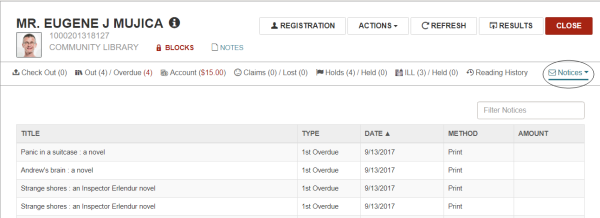
Patron Record - Notices View
The Notices view of the patron record displays the patron’s notification history. To open the Notices view of the patron record, select More | Notices.
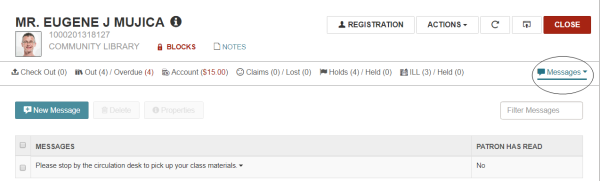
Patron Record - Messages View
The Messages view of the patron record displays the patron's messages. To open the Messages view of the patron record, select More | Messages.
Patron Record - Blocks View
The Blocks view displays the patron blocks. To open the Blocks view, select More | Blocks.

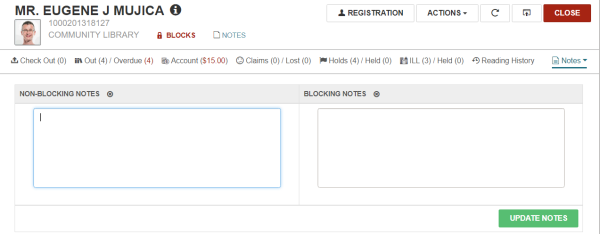
Patron Record - Notes View
The Notes view of the patron record displays the patron notes. To open the Notes view, select More | Notes.
Patron Record - Record Sets View
To see the record sets that include the patron record, select More | Record Sets. The record sets are listed in the following columns: NAME, OWNER, TOTAL RECORDS, CREATION DATE, NOTE.You can click on a record set in the list to open the Patron Record Set workform.
