Viewing Cancelled Holds
Using the View Cancelled Holds feature, you can view information about cancelled holds for a specific patron and replace cancelled holds.
| Holds cancelled using: | Appear in the Program column as: |
|---|---|
| the Holds tab | Sierra Desktop |
| the Clear Holdshelf function | Clear Holdshelf |
| the WebPAC | Web OPAC |
| Priority Paging | Priority Paging |
| Express Lane | Express Lane |
This feature does not include cancelled holds on virtual records (that is, cancelled ILL or INN-Reach holds).
To view hold cancellation information:
- Retrieve the patron record whose hold was cancelled.
- Click the Holds tab.
- Click View Cancelled Holds. The system:
- Purges any hold-cancellation information that is more than a specific number of days old. By default, the system purges hold-cancellation information that is more than 30 days old. (This 30-day period begins when the hold is cancelled, which might not coincide with the hold expiration date.) If your library wants to change the number of days that the system keeps hold-cancellation information, contact Innovative. The recommended maximum number of days to retain information on hold cancellations is 365.
- Displays the appropriate message:
- If there are any recently cancelled hold(s) remaining (holds that are less than 30 days old), the Cancelled Holds dialog box displays information about the hold and its cancellation.
- If the patron does not have a recently cancelled hold(s) remaining, the system indicates that there are no cancelled holds to view.
- (Optional) From the Cancelled Holds dialog box, you can do the following:
- Click Print to print the dialog box.
- Place a new hold on a record in the list. To do so, select a cancelled hold, right-click, and click Add Holds. From the Summary tab, complete the title-level, item-level, or volume-level hold.
- Replace one or more holds using the original hold data.
- Click OK to close the dialog box.
Replacing Holds
From the Cancelled Holds dialog box, you can replace one or more cancelled holds. When you replace a hold, Sierra creates a new title-level hold using information from the original hold. See How Sierra Replaces Holds for more information.
To replace a hold:
- Select the box for each cancelled hold you want to replace.
- Do one of the following:
- Click Place Title Hold at Queue End to insert the new hold at the end of the hold queue.
- Click Insert Title Hold by Original Placed Date to insert the new hold in the order determined by the date the original hold was placed.
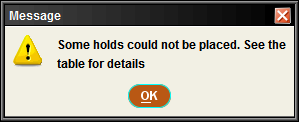
Sierra processes each hold request and displays the following message, if any holds could not be placed.

- If prompted with a message, click OK to return to the Cancelled Holds dialog box. Sierra displays the reason the hold was blocked in the Result column.
Sierra does not retain the information in the Result column when you close the Cancelled Holds dialog box.
How Sierra Replaces Holds
When you replace a hold, Sierra does the following for each hold request:
- Determines whether there are any patron or hold blocks preventing the hold from being placed. If a block exists, Sierra starts processing the next hold. Otherwise, Sierra continues to the next step.
- Creates a new title-level hold as follows:
- If the cancelled hold was on a bibliographic or volume record, Sierra places a new hold on the same bibliographic or volume record.
- If the cancelled hold was on an item and the item is attached to a volume record, Sierra places a new hold on the item's volume record.
- If the cancelled hold was on an item and the item has no volume record, Sierra places a new hold on the first bibliographic record attached to the item record.
- Copies the following information from the original hold to the new hold:
- Pickup Location
- Limit to Location
- Hold Note (If no hold note exists, Sierra adds a note containing the date and time the original hold was placed.)
- Not Wanted Before date (if the date is valid and the hold is not frozen)
- Enters the default Not Wanted After date in the new hold.
- Determines whether the hold is can be paged, and if so, automatically pages it.
