Adding Sessions
You can add additional sessions at any time after creating the section record. Sessions include the meeting date(s) and time(s) of the section.
To add a session:
- Choose Program Management from the Function list.
- Retrieve the section record for which you want to add sessions.
- Choose the Sessions tab. This tab shows the Sessions table which lists the existing sessions, a Session Summary box, and a calendar.
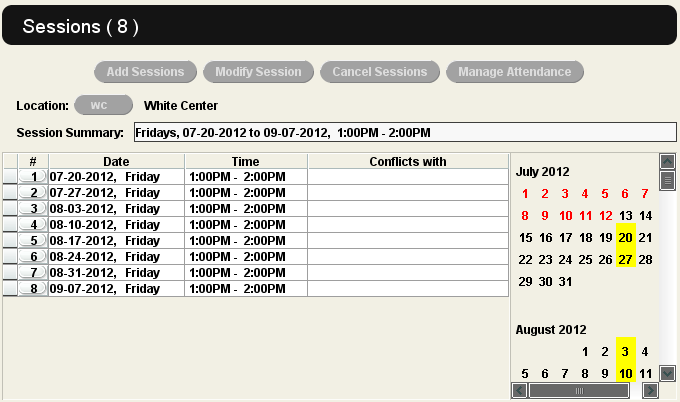
In the calendar pane, you can view a calendar of days starting with the current date and ending 365 days in the future. Days the library is closed and days in the past (days of the current month before the current date) are shown in red. Days on which a session is scheduled, as listed in the Sessions table, are highlighted in yellow.
- Choose the Edit button on the Sessions tab (as opposed to the Edit button on the toolbar which accesses the program record). Sierra places you in edit mode, and the Edit button changes to Exit Edit. In this mode, you can add sessions, edit future sessions, and cancel sessions.
- To add a session, choose the Add Sessions button or, from the calendar, double-click the day on which to schedule the session (or begin scheduling the series of sessions). The system displays the Add Session dialog box.
- Enter the details for the session(s) you are adding. For information on how to use the Add Sessions dialog box (including limitations on entering dates), see Entering Session Data.
- Update the information in the Session Summary box. Note that you can also update this information after adding new sessions. See Updating Session Summary Information below for more information.
- When you are finished entering session data, choose OK to create the session(s). To return to the Sessions tab without creating sessions, choose Cancel.
If you have enabled the feature to detect room conflicts, the system displays the message reserved by <section record #> next to each session in the Sessions table if the room is already reserved by another section.
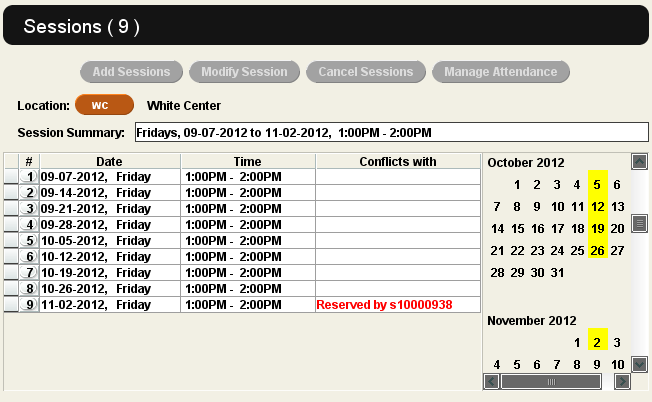
You must resolve all room conflicts before you can save the section record.
- If you want to add more sessions, repeat the steps above. If you want to change the starting time and/or duration of a session, choose the Modify Session button.
- When you are finished adding sessions, choose Save on the toolbar. Sierra saves the sessions to the section record and exits the edit mode.
Updating Session Summary Information
The Session Summary text box on the Sessions tab displays only the sessions created during the initial section record creation. If you add more sessions at a later point, you will need to update session summary information. You can do one of the following:
- Edit this information manually (during session creation or afterward)
- Delete all the sessions, create new sessions, and let the system repopulate session summary information
Manually updating session information
To manually update session summary information, edit the entry in the Session Summary box on the Add Session dialog during the process of creating additional sessions. To update session summary information after you have made changes to the original schedule, you can directly edit either the contents of the Session Summary text box on the Sessions tab or the Session Summary variable-length field of the section record.
Deleting and recreating session information
To delete all session information and start anew (thereby enabling the system to automatically repopulate the Session Summary text box):
- Choose all the sessions and use the Cancel Sessions button to delete the sessions from the Sessions table.
- On the section record tab, delete the entire Session Summary variable-length field (i.e., delete both the variable-length field tag and the field's contents).
- Save your changes.
In addition to the Session Summary text box of the Sessions tab, the system also displays session information in the following areas:
- in the Session Summary variable-length field of the section record
- if added to the customizable web forms for Program Registration, session information can also display in the WebPAC on the following pages:
- program display page
- registration page
- confirmation page