Creating and Editing Queries
To access the Query Editor and create a new query, select New Query. To access the Query Editor to edit a saved query, select a query, and then click Edit Query.

To create a query, you must specify the following:
- Query name
- Set of records to include
- Type of record on which to report
- Query type
- Accumulation method
- "Multi" field handling
If the query is based on order records, you can choose to limit the query to a specific range of invoice or paid dates.
You can select an existing saved query, modify any of these parameters, and save the query with a new name.
After these parameters are set, select Run the Query! to start data accumulation and open the Results Files tab, or select Schedule the Query to specify a time at which the query should run.
Specifying the Query Name
The system provides default names for the query and the associated results file. You should enter more descriptive names in the Saved Query Name and Results File Name boxes before starting the query. The Copy button copies the Saved Query Name to the Results File Name box.
Specifying the Set of Records to Include
You specify the set of records to examine by defining a query via the Range dropdown menu and related controls. After you define the query, specify the record type to report on using the Report On dropdown menu. This separation provides flexibility in reporting. For example, it lets you query the database for bibliographic records that meet specific criteria and then gather statistics on their linked item records.
You can search for and report on any record type except contact records. The Query Editor prevents you from selecting contact records as the record type to search or as the record type to report on (for example, if you're searching for license or resource records).
The Range dropdown menu's options are:
Range
Use this option to specify a range of database records to include in the results. Enter record numbers (with the record type prefix and trailing check digit) in the Start and Stop boxes.
When you enter the record type prefix (e.g., 'p' for patron) into the Start or Stop box, the system automatically fills the Start and Stop boxes with the record numbers of the first and last record of that type in the database. You can edit these default record numbers to examine a smaller range of records.
When you save a query based on a record range, the system presents the following dialog box:
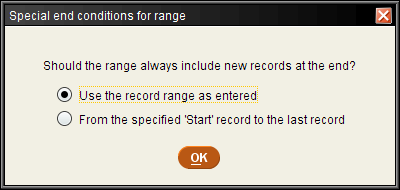
Your choice affects the range of records examined if the query is rerun in the future. If you select Use the record range as entered, then the same range of records is examined, no matter how many records are subsequently added to the database. If you select From the specified 'Start' record to the last record, the last record of the specified type in the database is used as the end of the range, overriding the record number that originally was entered into the Stop box.
Review
Use this option to examine the records contained in a previously created review file in the results. Select a review file from the Review file dropdown menu.
Altered Review Files
Statistics stores the number of the review file you select as part of the query. It does not store the record numbers or search criteria contained in the review file. If the review file is altered or emptied after the query was last saved and the query is re-run, the system uses the new contents of the altered review file to generate the statistics data.
Index
Use this option to extract records from the database based on an indexed field. Select an indexed field from the Index dropdown menu, and enter one or a range of matching indexed values in the range boxes. For example, you might choose to search in the Author index, starting with the name "aaron" and ending with the name "adams." Note that both search targets must exist in the database (use of '*' as a wildcard is not supported).
Advanced
Use this option to search the database by keywords using advanced Boolean search syntax. For example, entering the search target "california and (college or university)" would retrieve records containing the words "california" and "college" and records containing the words "california" and "university."
Specifying the Type of Record to Report On
Use the Report On dropdown menu to select the record type on which to report statistics. The menu's options depend on the query you specify and include all "reportable" record types. That is, given the query, the options include all record types that might be returned and those of linked records. This lets you do things like query the database for bibliographic records that meet specific criteria and then gather statistics on their linked item records.
Some types of queries return records of a single type, but others can return records of multiple types. Your selection here determines which to report on and which to disregard.
If you select Order in this menu, you can limit the query to a range of invoice or paid dates. Selecting Order enables more menu options in the lower part of the Query Editor window. For more on this, see Limiting the Query to a Range of Invoice or Paid Dates below.
Specifying the Query Type
Selection of a query type determines the types of reports that can be created from the query results. It also affects the menu options available in the lower part of the Query Editor window. The query type can be one of the following:
Field Statistics
Gathers statistics on all fixed-length fields in the specified record type. When viewing the query results, you can select which fixed-length fields to include in the report.
Periodic Report
Enables you to limit the query to only records in which a selected date field matches a specified range of years, quarters, months, or days.

The date fields available in the Choose a date field dropdown menu depend on the selected record type. The options in the Date Range menu depend on the selected Time Units. For years and quarters, you can select either a fiscal or calendar year for the range. See below for examples on how these options differ.
Use Calendar Year
If you select this option, Sierra uses the calendar year for your query. For example, a query set up to report on the year 2019 includes the months of January 2019 through December 2019.
If you select this option with quarters as the Time Units, Sierra breaks up the calendar year as follows:
- Q1 = January - March 2019
- Q2 = April - June 2019
- Q3 = July - September 2019
- Q4 = October - December 2019
Use Fiscal Year
If you select this option, Sierra uses the fiscal year as set on your system for your query. For example, if your fiscal year runs from July 2019 through June 2020, Sierra uses those months when you select years as the Time Units.
If you select this option with quarters as the Time Units, Sierra breaks up the fiscal year into quarters. Assuming the fiscal year stated above (July 2019 through June 2020), the quarters would include the following months:
- Q1 = July - September 2019
- Q2 = October - December 2019
- Q3 = January - March 2020
- Q4 = April - June 2020
Settings Configured by Innovative
- Contact Innovative to specify the start of your library's fiscal year. If your library is set up for multiple accounting units, each unit can be set up with different fiscal year starting months.
- By default, a maximum of 32 time periods can be selected for a periodic report, but Innovative can increase this number upon request.
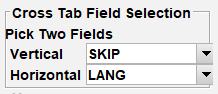
Cross Tab
Enables you to choose a fixed-length field for the vertical axis of the report, paired with a different fixed-length field for the horizontal axis. The two fields are selected with the Vertical and Horizontal dropdown menus in the Cross Tab Field Selection section.
The system doesn't enable the selection of the same field for both axes.
To specify whether the field code (for example, "main"), field meaning (for example, "Main Library"), or both appear, configure the Cross Tab horizontal title display option in the login's Statistics settings.
SCAT Tables
Statistical Category (SCAT) tables are available for both the horizontal and vertical axes in a Cross Tab report. Innovative recommends that you choose a SCAT table for only the vertical axis. A Cross Tab report with a SCAT table in the horizontal axis might be difficult to view and navigate due to the large number of generated columns.
Specifying the Accumulation Method
If Fastest Accumulation is selected, Statistics doesn't update the Results File display for this report until all data has been accumulated. This can result in much faster completion because the system does not have to periodically send fresh display data to the client. Even if this option is selected, you can stop accumulation at any time and view the results gathered so far (the display is updated whenever accumulation is stopped or suspended).
Splitting "Multi" Fields
Order records can contain more than one fund code. Similarly, bibliographic, order, and checkin records can contain more than one location code. In a record with multiple fund codes, the FUND fixed-length field contains the special code "MULTI," and a separate variable-length field called FUNDS contains the actual fund codes. Records with multiple location codes have "MULTI" in the LOCATION fixed-length field, and a separate variable-length field called LOCATIONS contains the actual location codes. See Modifying Fields with Multiple Copies or Funds for more information on "MULTI" fields.
If you choose to split "Multi" fields, Statistics counts each record several times, once for each separate location or fund (in the case of orders). This makes the statistical report totals for location and fund greater than the total number of records included in the report. Note that this result only occurs for the reports by location or fund. Other reports within the same results file, such as reports by fixed fields, don't display expanded totals.
You can choose to count such "MULTI" records on per-record or per-code basis. If Split multi is selected, the system counts each location or fund code in the record as a separate entity. If Do not split multi is selected, the system counts each record only once no matter how many fund or location codes it contains.
For order records only, the FUNDS field can contain a percentage of the total cost that is to be applied to each copy or volume. The Split multi by copies and Split multi by volumes selections let you choose how to apply these percentages when accumulating data.
Split multi by copies
When this option is selected, the column labeled $Payments (in Field Statistics and Cross Tabulation reports) or $ Period (in Periodic reports) contains, for each payment, the payment amount divided by the number of paid copies in the payment. The resulting amount is allocated to each affected fund or location in the report.
For example, in the case where two copies of a 10-volume set were ordered and paid for out of funds 'abk' and 'bbk,' at a cost of $100.00 total, $50 would be applied to 'abk' and $50 to 'bbk.'
Split multi by volumes
When this choice is selected, the column labelled $Payments (in Field Statistics and Cross Tabulation reports) or $ Period (in Periodic reports) contains, for every payment, the number of paid copies divided into the dollar amount of the payment, which is then divided by the number of volumes to arrive at a per volume (that is "per piece") dollar total. The system then allocates that amount to each affected fund or location in the report.
Thus in the case where 2 copies of a 10 volume set were ordered and paid for out of funds 'abk' and 'bbk', at a cost of $100.00 total, $5.00 would be applied to 'abk' and $5.00 to 'bbk'.
Limiting the Query to a Range of Invoice or Paid Dates
(Order Records Only)
If you select order records for the record type, the Limit the results by a date range box is available. If this box is selected, you can specify a range of paid dates or invoice dates to which the query is limited. You can also do a comparative report on any two time periods.
The options for limiting the query depend on the selected Time Resolution.
Yearly
You can choose either fiscal or calendar year for the range.
Quarterly
You can choose either fiscal or calendar year for the range.
Monthly
You can enter the months in each box directly. Alternatively, select one of the month boxes, and then press the T key to enter the current month, the B key to enter a blank date, or the C key to open a calendar window from which to select dates.
Day Range
You can enter the dates in each box directly. Alternatively, select one of the date boxes, and then press the T key to enter today's date, the B key to enter a blank date, or the C key (or double-click in the entry box) to open a calendar window from which to select dates.
Fiscal Year Start
Contact Innovative to specify the start of your library's fiscal year. If your library is set up for multiple accounting units, each unit can be set up with different fiscal year starting months.