Managing My Lists
To view the records saved to My Lists, complete the following steps:
- Log into your patron record.
- Click on the My Lists link.
The ICON_MYLISTS Web option controls the appearance of the My Lists link. The <!--{mylists}--> token on the patronview_web.html Web form controls the placement of the My Lists link.
The WebPAC displays of your lists. For example:
- (Optional) You can sort lists by list name, description, or date added by clicking the hyperlinked text above the appropriate column.
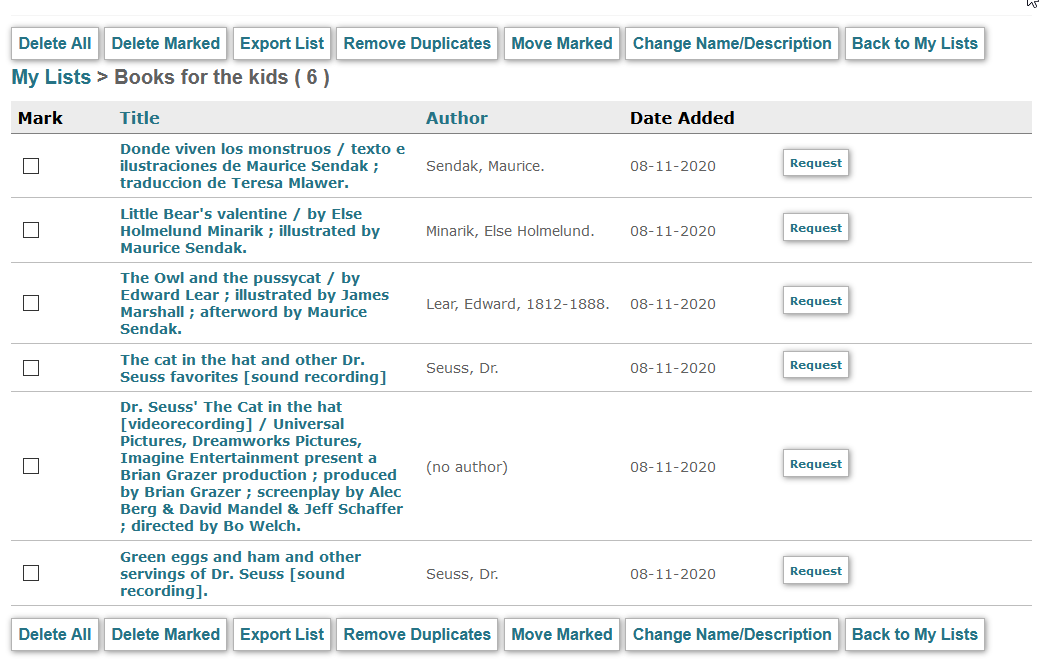
- Click on a list name to select a list to view. WebPAC displays the selected list. For example:
- On this screen, you can:
- Sort records by title, author, or date added to the list
- Export records
- Delete entries
- Move records between lists
- Rename existing lists
Sorting Entries in My Lists
To sort entries in My Lists, click the hyperlinked text above the appropriate column. Choices are:
- Sort by title
- Sort by author
- Sort by date the entry was added to the list
Exporting Records in My Lists
To export records, click the Export My Lists link. The display for this link is controlled by the ICON_MYLISTS_EXPORT Web option.
For more information on exporting records, see Viewing and Exporting Saved Records.
Deleting Records in My Lists
To delete all records in My Lists, click the Delete All icon. Click OK, when prompted.
The Delete All icon display is controlled by the ICON_PAT_DELETE_ALL Web option.
Deleting Multiple Records
The system allows users to delete up to 200 records at a time.
To delete selected records in My Lists:
- Check the Mark box next to each appropriate record entry.
- Click the Delete Marked icon.
The Delete Marked icon display is controlled by the ICON_PAT_DELETE_MARKED Web option.
Moving Records Between Lists
To move records between lists:
- Select a list.
- Check the box in the Mark column for each record to move.
- Click the Move Marked link.
The ICON_MYLISTS_MOVE Web option controls the appearance of the Move Marked link.
- Select an existing list or create a new list from the drop-down list. For example:
- Click the Submit link to move the selected records.
Empty Lists
If you move all records from a list, the system automatically deletes the empty list.
Renaming Existing Lists
To rename existing lists or change list descriptions:
- Click the list you want to rename.
- Click the Rename List link.
The ICON_MYLISTS_RENAME Web option controls the appearance of the Rename List link.
- In the dialog box, enter a new list name, list description, or both. For example:
- Click Submit to complete the changes to the list name or description.


