Maintaining Scoping Menu in Sierra client
You can maintain scoping menus in Sierra client and edit the wording of menu lines, scope names, as well as view the scope rules associated with a scope. Additionally, you can reorder scopes as they appear in the WebPAC drop-down list, as well as alphabetically.
Editing Scope Menu Entries
To edit a scope menu entry:
-
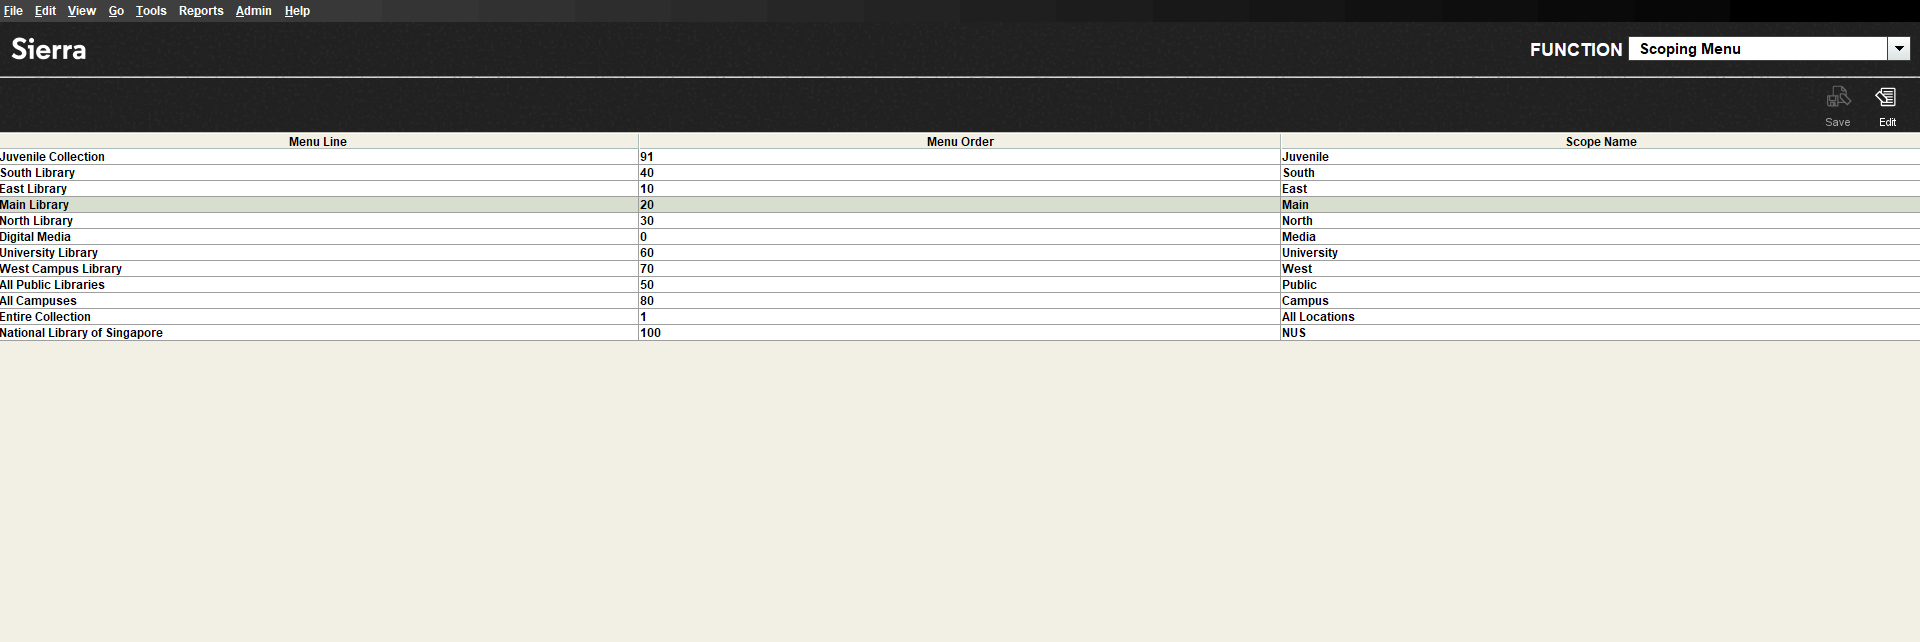
Select Scoping Menu, from the Function list.
The Scoping Menu screen appears.
-
(Optional) click on the Menu Line column header to order it alphabetically.
-
Select a desired entry.
-
Select Edit.
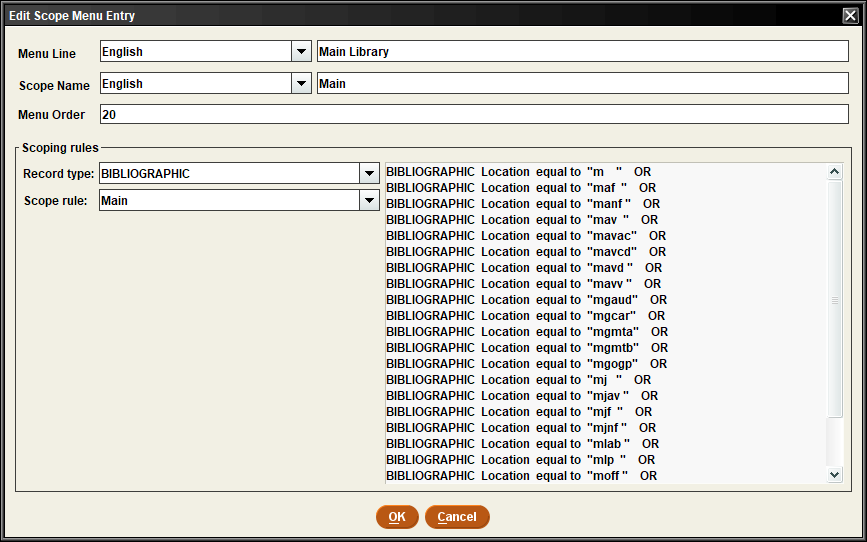
The Edit Scope Menu Entry window appears.
-
Edit the information.
The available fields are:
-
Menu Line - Enter the entry name in the menu. You can choose the language for the name.
-
Scope Name - Enter the name of the scope. You can choose the language for the name.
-
Menu Order - Enter the numerical order of that scope in the menu.
-
Record type - Choose the record type for the scope.
-
Scope rule
-
-
Select OK.
-
Select Save in the top right corner.
The edited scope menu is saved with the edited entries.

