Add an Invoice Line Item to a Miscellaneous Invoice
You can add an invoice line item to a Miscellaneous invoice when all of the following conditions are true:
-
You have the following permissions enabled in Polaris Administration:
- Invoices: Create
- Invoices: Modify
- The invoice has a status of Open.
Note:
To add other types of invoice line items, see Add an Invoice Line Item for an Existing Bibliographic Record or Add an Invoice Line Item and a Brief Bib Record.
To add an invoice line item to a Miscellaneous invoice
- Find the invoice you want to edit, and open it in the Invoice workform.
- Select the Line Items view.
-
Select NEW LINE ITEM.
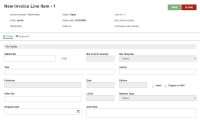
The New Invoice Line Item workform appears.
- Enter a title in the Title box.
- (Optional) Enter an author in the Author box.
- (Optional) Select the Alert checkbox to display an alert icon for the line item on the Line Items view of the Invoice workform.
- (Optional) Enter a number in the Other No. box. This field corresponds to the bibliographic record 024 tag.
- (Optional) Enter the date when invoice materials were shipped in the Shipped Date box.
- (Optional) Enter text in the Alert Note box.
- Enter a number in the Unit Price box.
-
(Optional) Edit the Discount Rate.
Notes:
- Leap automatically applies the supplier's current discount rate to the invoice line item.
-
Leap automatically calculates the discount rate if you enter the unit price and discount price. The discount rate can have up to four decimal places.
-
(Optional) Edit the Discount Price.
Note:
Leap automatically calculates the discount price if you enter the unit price and discount rate. - Select the Segments view.
-
 Add at least one line item segment.
To add a line item segment
- On the Invoice Line Item workform, select the Segments view.
- Select the Orders view.
- (Optional) Enter text in the Filter box to filter the list of segments.
-
Select +NEW SEGMENT.
The Add Segment dialog appears.
- Enter a number in the Quantity box.
-
(Optional) Do one or more of the following:
-
Select a library or branch from the Destination list.
Note:
The destination you select must have at least one fund. - Select a collection from the Collection list.
- Select a fund from the Fund list.
-
-
Select OK.
- Select SAVE.
