Previewing Resource Content in WebPAC
You can display HTML or XML content from a target resource in a browse display or bibliographic record in WebPAC.
WebPAC contains the following XSLT files in the live/xslt directory, which can be used to define how the content displays:
- elcontent_brief.xsl
- elcontent_full.xsl
- elcontent_overlay.xsl
- elcontent_static.xsl
These files also define the Close icon for the displayed content. To display a Close icon, the XSLT file references an image file called close.gif in WebPAC live/screens directory. The close.gif file must be in the live/screens directory for the Close icon to appear in the displayed content.
To edit these files, customize the Sierra login to make your library's XSLT directories available for staff to view or manage data in the Web Master function.
To display the resource content:
- Access the WebBridge Management menu by either:
- entering http://your_library_[domain]/webbridge/edit in the browser address window
- choosing Admin | WB Edit in an application
The WebBridge Management menu displays: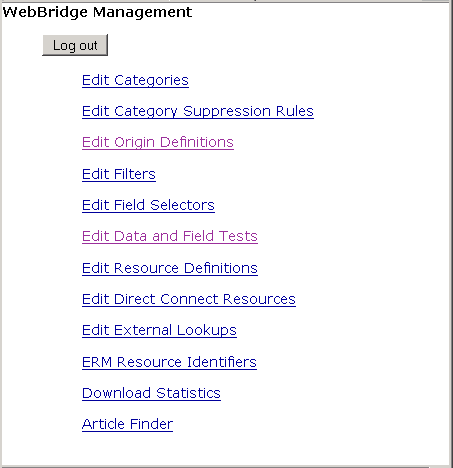
NOTE
Only one user can be logged in to the WebBridge Management menu's edit function. Other users can access the menus in View Only Mode.
If there is no activity by a login within the timeout period, the user is automatically logged out.
- Choose Edit Resource Definitions.
The WebBridge Management - Resources menu displays: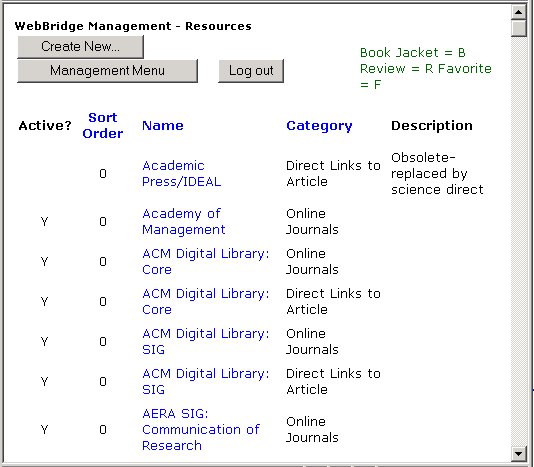
- Choose a resource definition. The WebBridge Management - Resource menu displays:
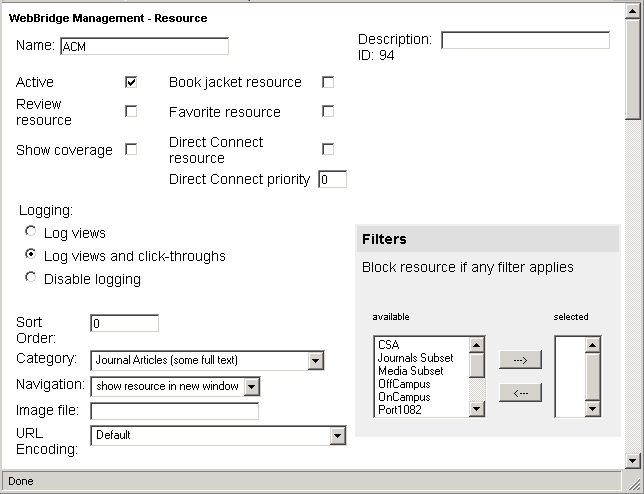
- Scroll to the Bibliographic Record Linking section of the WebBridge Management - Resource page:
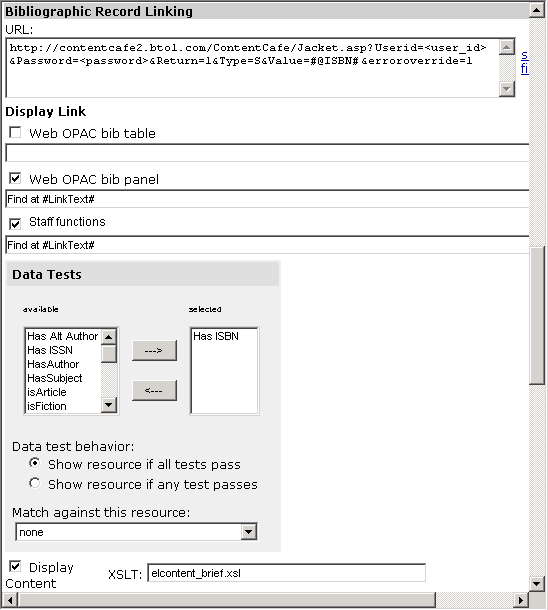
- Enter the external content's URL in the URL text box.
For dynamic content, insert a field selector variable in the URL. Variables are indicated by the pound (#) sign. For example:
http://contentcafe2.btol.com/ContentCafe/Jacket.aspx?Userid=<user_id>&Password=<password>&Return=1&Type=S&Value=#@ISBN#&erroroverride=1 - Enter the ELCONTENT token, or the IFELCONTENT and ELCONTENT tokens, in the briefcit.html or bib_display.html file.
- Select the Display Content check box.
- Enter an XSLT file name in the XSLT text box. The file must be present in the live/xslt directory of your WebPAC.
- Choose Save.