Customizing Facet Display Settings
Using the Sierra Admin App, you can define which facets appear in the Sierra Desktop Application, the order in which they appear, and whether each facet appears in the expanded or collapsed format by default. Note that these settings control the display of facets for all users of your system. You can also use the Sierra Desktop Application to access the facet display settings.
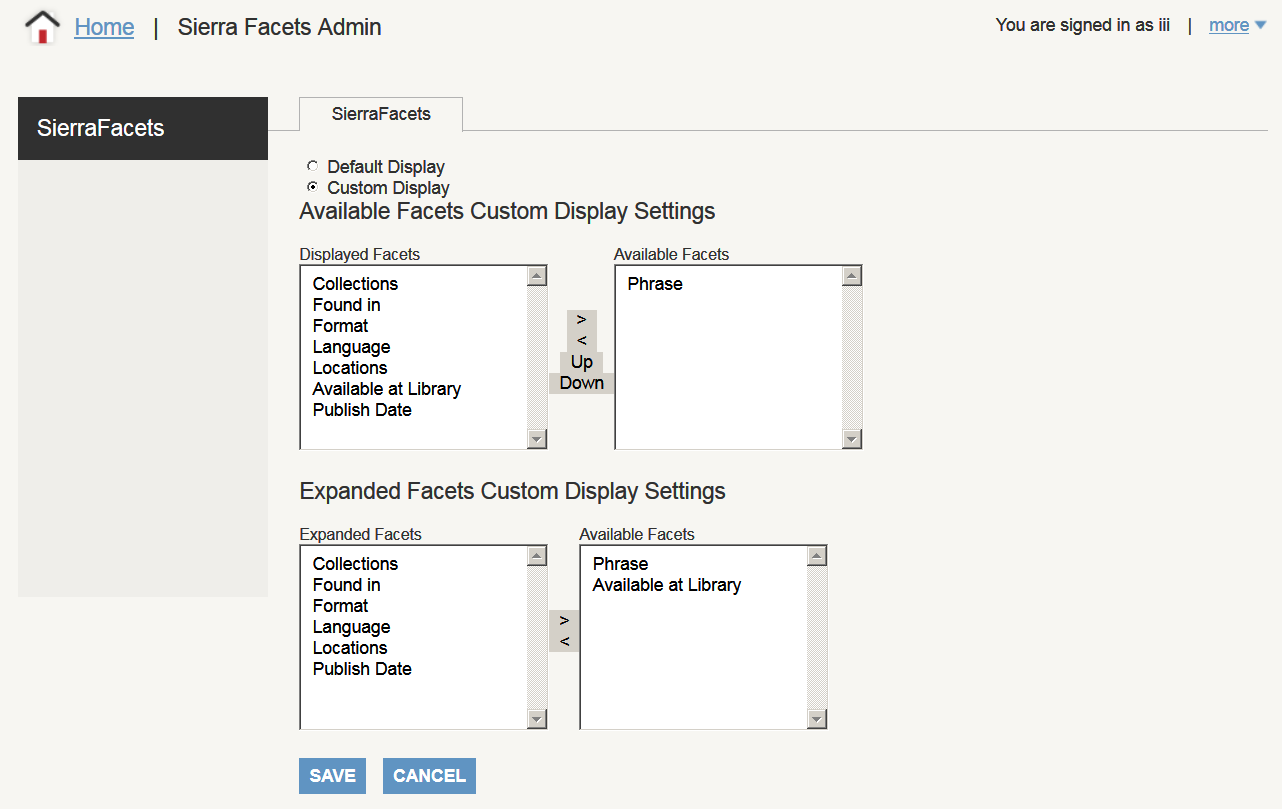
When you select the Sierra Facets option from the Admin App's Home page, the Sierra Facets Admin page appears.
If the Default Display option is selected, Sierra displays the following facets in the expanded format:
- Collections
- Found In
- Format
- Language
- Locations
- Available at Library
- Phrase
- Publish Date
To customize your facets, do the following:
- Select the Custom Display radio button. The Admin App displays the customization settings.
- In the Available Facets Custom Display Settings section, you can define which facets you want to appear by adding them to the Displayed Facets list. The facets will appear in your Sierra system in the order in which they appear in this list.
To move a facet, highlight the facet, and do one of the following:
- Click the left (<) or right (>) arrows to move a facet into or out of the Displayed Facets list.
- Click Up or Down to reorder the facets within the Displayed Facets list.
- In the Expanded Facets Custom Display Settings section, you can define how you want your facets to appear by default. Facets in the Expanded Facets list appear in the expanded format by default; all other facets enabled on your system display in the collapsed format by default.
To move a facet into or out of the Expanded Facets list, highlight the facet, and click the right (>) or left (<) arrow.
- When finished, click Save.
