Bulk Change Item Records
You can bulk change item records from record sets in Leap.
When you are changing notes or other free-text fields, you can replace the text, add the text to the beginning of the existing text (prepend), or add the text to the end of the existing text (append).
To bulk change all item records in a record set:
- Open the Item Record Set workform for the record set containing the items you want to change.
- Click ACTIONS in the workform header, and select Bulk Change.
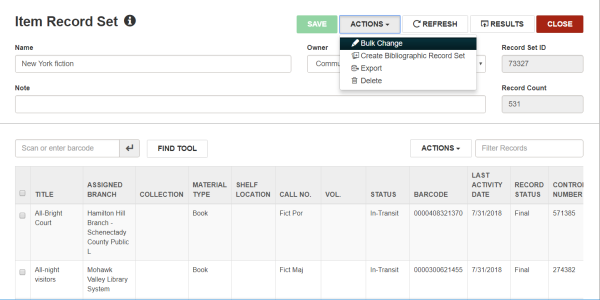
The Item Record Bulk Change workform opens, and you can make bulk changes to the entire record set.

To bulk change a selection of items in an item record set rather than the whole record set:
- Open the Item Record Set workform for the record set containing the items you want to change.
- Click Actions, and then select Ad Hoc Bulk Change.
Note:
This option is enabled only when at least one item is selected in the record set workform.
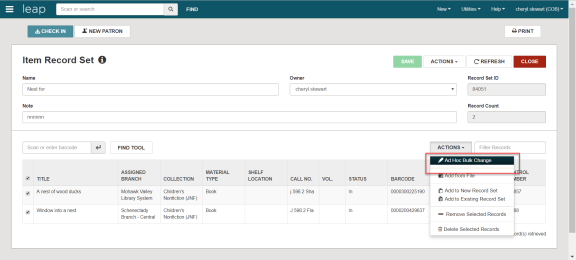
The Item Record Bulk Change workform opens, and you can make bulk changes to the selected items in the record set.
You can also save and reuse item record bulk change settings as Item Record Bulk Change Templates. This option requires the appropriate permissions. See Item Record Bulk Change Templates.
You can change the following data on the Item Record Bulk Change workform for the item record sets:
- (Optional) To change the name of the report that appears in the Bulk Change Report box, type a different name.
- (Optional) To create a record set containing any records that could not be changed, do the following:
- Select the Name check box under Error Record Set.
- Type a name for the record set.
- Select the record set owner in the Owner box.
- To change the location information for the items in the record set, click the Location tab (if not already displayed), and do the following:
- Select an option from one or more of the following drop-down lists:
- Owning Branch
- Assigned Branch
- Collection
- Shelf Location
- Home Branch
- Click the Temporary Location check box, and type a temporary location.

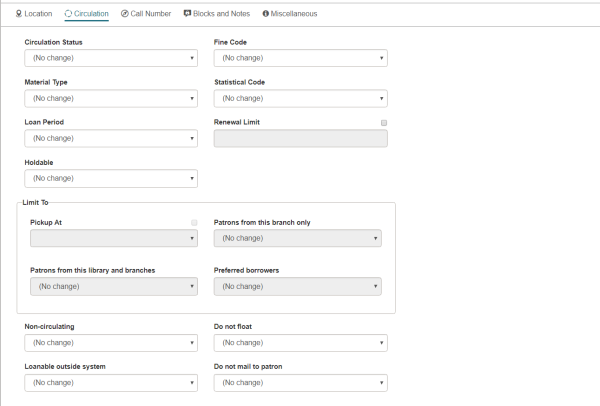
- To change the circulation information for the items in the record set, click the Circulation tab and do the following:
Note:
Certain circulation statuses cannot be changed using the bulk change process because of automatic processes and the effects these changes may have on linked records. For example, you cannot change the circulation status of Out to In.
- Select an option from one or more of the following drop-down lists: Circulation Status, Fine Code, Material Type, Statistical Code, or Loan Period.
- Click the Renewal Limit check box, and select a number from the list.
- Select Checked or Unchecked to change the check box settings for the following fields in the item records:
- Holdable - Checked must be selected to change the holds Limit To settings.
- Pickup At - Select the check box and select a pickup branch.
- Patrons from this branch only
- Patrons from this library and branches
- Preferred borrowers
- Non-circulating
- Do not float
- Loanable outside system
- Do not mail to patron
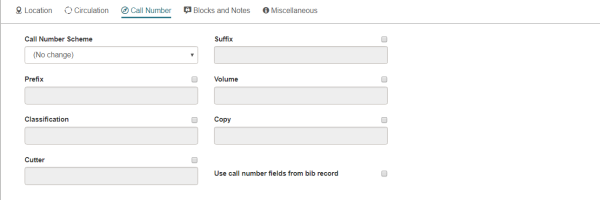
- To change the call number information for the item records, click the Call Number tab, and do the following:
- Select an option from the Call Number Scheme box.
- Select the check box for the Suffix, Prefix, Volume, Classification, Copy,or Cutter field and type the text in the field.
- To copy the call number fields from the linked bibliographic records, click the Use call number fields from bib record check box.
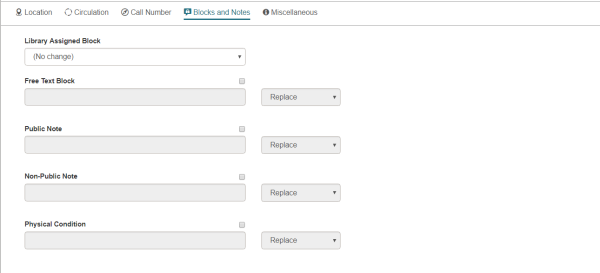
- To change blocks and notes for the items, click the Blocks and Notes tab, and do the following:
- Select the block from the Library Assigned Block drop-down list.
- Select the check box next to the Free Text Block, Public Note, Non-Public Note, or Physical Condition box.
- Type the text, and then select Replace, Append, or Prepend.
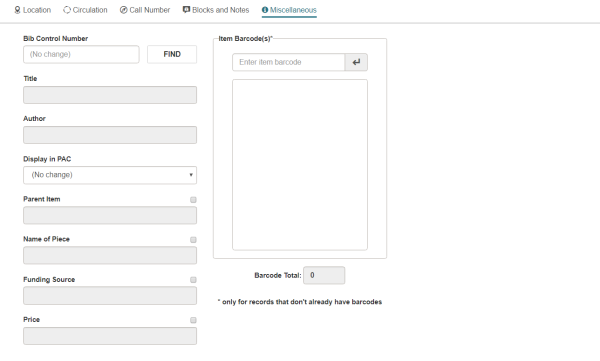
- To change or add miscellaneous information, click the Miscellaneous tab, and do the following:
- Click FIND and select a bibliographic record to update the Bib Control Number. After the bulk change process is complete, the items are linked to this new bibliographic record, and the information from the bibliographic record appears in the Bib Control Number, Title, and Author boxes.
- Select Checked or Unchecked in the Display in PAC box to change the setting in the item records.
- Select the check box next to the Parent Item, Name of Piece, Funding Source, or Price field; and type the text in the associated box.
- To add barcodes to item records that do not have barcodes, scan or type a barcode in the Item Barcode box, press the arrow button, and repeat for each subsequent barcode entry.
Note:
If you scan or type the barcodes, they are assigned to the items in the order in which the items are listed in the record set. The number of barcodes appears in the Barcode Total box.
- Click UPDATE ITEMS to initiate the bulk change process.
Error messages appear for any specified updates that cannot be made.
The Summary of Changes dialog box displays the details regarding the changes that will be made to the item records in the record set.
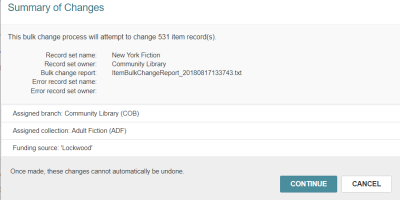
- Click CONTINUE to start the bulk change process.
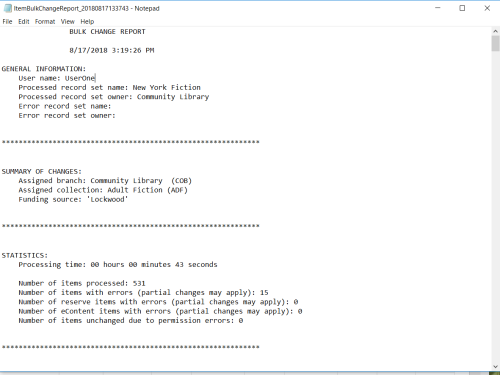
When the bulk change process is done, the Item Record Set workform appears, and the report is downloaded to your workstation, where it is available at the bottom of your browser or in the downloads folder.
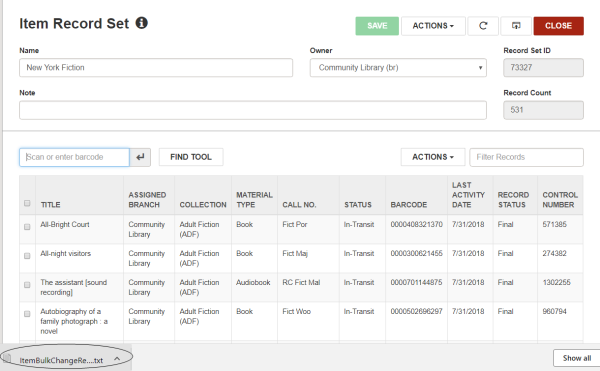
- Click the bulk change report to open it.
