View and upload offline transaction files
Note:
This procedure differs for Polaris Hosted customers. Polaris Hosted customers can find specific instructions on the Polaris Hosted Utilities page or the Innovative Customer Supportal (https://support.iii.com).
To view and upload offline transaction files to your online client:
Tip: ![]()
Click this button on the Shortcut Bar to display the Bookmobile workform.
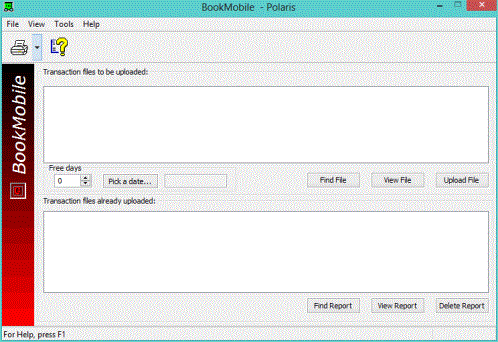
- Using your online staff client, select Circulation, Bookmobile from the Polaris Shortcut Bar. The Bookmobile workform appears. The list displays the transaction files available on the local drive.

In a terminal server environment, specify which transaction files you want to display in the Transaction files to be uploaded list:
- Select Tools, Options. The Bookmobile: Tools Options dialog box appears. Then select a Display files option:
- Created by logged on user - Files created by the user currently logged on
- Created by workstations at this branch - Files created by workstations at the branch
- All offline transaction/log files - All files on the computer. In non-terminal server environments this option is selected and cannot be changed.
Note:
If the transaction files were created in a non-terminal server environment, but you are working in a terminal server environment, you can click Find File (or press ALT+N) and navigate to the local machine’s files. Select the files (up to 50 at a time) to list them.
- To view files before uploading them, follow these steps:
- Select the transaction files in the Transaction files to be uploaded list. You can select up to 50 files at a time.
- Click View File. The View Transaction file dialog box displays the files.
- When you are finished viewing the files, click Close on the dialog box.
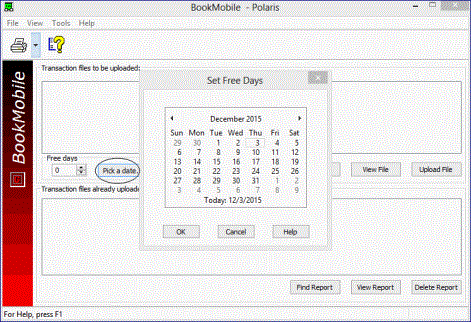
- Specify the number of days to omit from overdue fine calculation, if any, in the Free days box or click Pick a date and select a date from the calendar. See Free Days.

When you select a date from the calendar, the system automatically calculates the number of free days A value applied at normal and bulk check-in, renewal, and offline that allows you to omit a specified number of days from the overdue fine calculation.. The date box reflects the number of free days selected.
The specified number of days will be omitted from fine calculation when check-in transactions are uploaded. If you do not enter a value, the system uses the value set by the Patron Services parameter Free days (bulk) in Polaris Administration parameters. See Free Days.
- To set error handling during upload, follow these steps:
- Click Upload File. The Error Stop Option dialog box appears.
- Choose one of the following options, and click OK.
- Click stop on errors if you want the file upload process to stop for any file in which Polaris finds an error. When errors are found, a message indicates why the file is not being uploaded.
- Click continue and get error report in the end if you want Polaris to complete the file upload process and then compile an error report.
- Click Upload File to upload the selected files. The files are transferred to the Transaction files already uploaded list with a .log extension.
- To view the report, select the file in the Transaction files already uploaded list, and click View Report.
If the log files were created in a non-terminal server environment, but you are working in a terminal server environment, you can click Find Report (or press ALT+O) and navigate to the local machine’s files. Select the files to display them in the Transaction files already uploaded list.
Important:
Always review the report for errors after uploading offline files. See Upload Report Warning Messages.
To delete a transaction report, on the Bookmobile workform, select the log file in the Transaction files already uploaded list, and click Delete report.