Use Express Import to Import Records
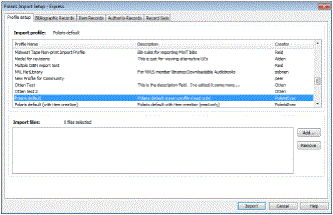
The Express Import option allows staff members to import records using an existing profile that specifies the appropriate importing options. The only settings that can be changed for an express import are the source file name, the report name, and the options on the Record Sets tabbed page. To import records using the Express Import option:
The Polaris Import Setup window appears.
Tip:
If you are importing authority records from Polaris ZMARC automatic authority updates, select the profile Authority Update Import.
- Select the profile from the list.
- Click the Add button to browse to the import file(s) on the computer desktop or network.
Tip:
If the profile was saved with a specific import file name, the file is selected automatically (if it exists). If the profile was saved with a directory location for the source files, when you click Add, the window opens to that directory.
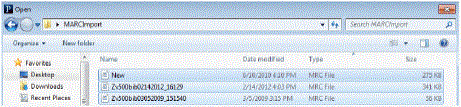
- Select the MARC or MARCXML file or files, and click Open.
The files are listed in the Import Setup window.
- To change the defaults for record sets, click the Record Sets tab, and follow the steps in Set import options for record sets.
- Click Import to import the records.
An initializing dialog box displays for a few seconds. If necessary, you can cancel the import by clicking Cancel on the message box. Canceled jobs do not appear in the Import Jobs Queue.
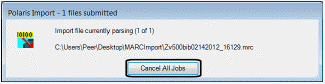
When initializing has completed, another message box appears.
- Click OK to see the Import Jobs Queue and the status of your import files.
Your files may be in a pending status for a few minutes before import processing begins.
Related Information