Create a new permission group
To add a new permission group to Polaris Administration:
Note:
You can also create a permission group by copying an existing group and then editing its members and permissions. See Copy a permission group.
Tip:
If you are setting permissions for the first time, set the Staff Client profile Generate security history to No. After security implementation is complete, set the profile to Yes so you can track changes to permission assignments. See Setting Staff Client Profiles. To see the security history for a permission, right-click the permission in the Control Record list (Administration Explorer, Security) and select Properties from the context menu.
- Open the Administration Explorer, and select File > New > Permission Group from the Explorer menu bar.

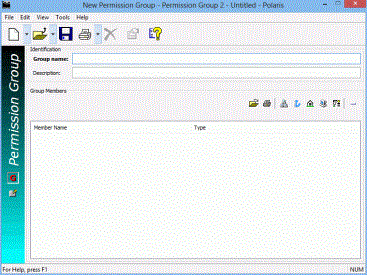
The New Permission Group workform appears.

Tip:
If you are creating standard permission groups for multiple libraries and branches, start the name with the organization’s abbreviation, followed by a brief title. The description can specify a standard purpose. This allows you to sort permission groups by their organization (Name column) or by function (Description column) in the Polaris Find Tool results list.
- Type a unique name for this permission group in the Group name box.
- Specify the purpose of the group in the Description box.
- Identify the staff members, workstations, and organizations that are members of this permission group. For details, see Manage members in a permission group.
- To add the system organization, click
 .
. - To add a library, click
 .
. - To add a branch, click
 .
.
Note:
Adding an organization (system, library, branch) to a permission group means that every staff member and workstation directly assigned to the organization has the permissions granted to the group. The Organization box on the Staff workform and the Parent Branch box on the Workstation workform define where the staff member or workstation is directly assigned.
- To add a workstation, click
 .
. - To add a staff member, click
 .
.
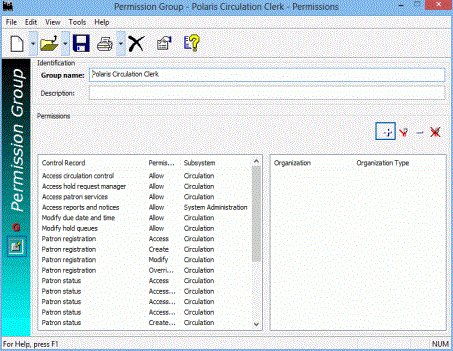
- Select View, Permissions and click
 above the Is Permitted To list to add permissions to the group. For details, see Assign permissions to staff, workstation, or group.
Tip:
The left side of the Permissions view displays the currently-assigned permissions (if any). When you select a permission that is organization-specific, the organizations are loaded on the right side.

- Select File > Save to add the new permission group.
Note:
To see the effects of your permission changes in the staff client, exit the staff client and log back in.