Configure a Receipt Printer (Windows)
Note:
- The settings that appear on the Printer Properties window may vary depending on your receipt printer. Innovative tests with Star and Epson printers.
- If your printed receipts contain too much white space, edit your browser's print settings to disable printing headers and footers.
To configure a receipt printer on Windows
-
Open the Control Panel and select View devices and printers.
The Devices and Printers window appears.
-
Right-click on a printer and select Properties.
The Properties window appears.
-
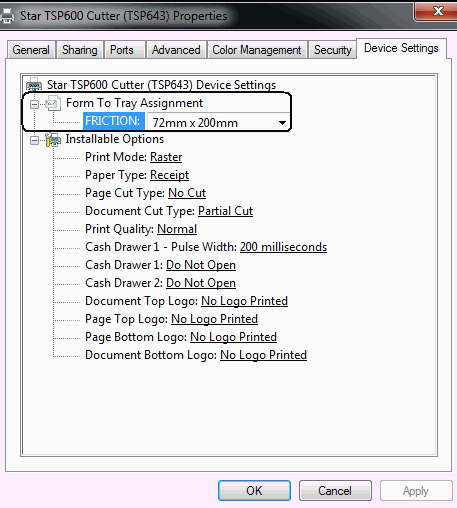
Select the Device Settings tab.
The Device Settings tabbed page appears.

-
Select Form To Tray Assignment > FRICTION:72mm x Receipt.

- Select OK.
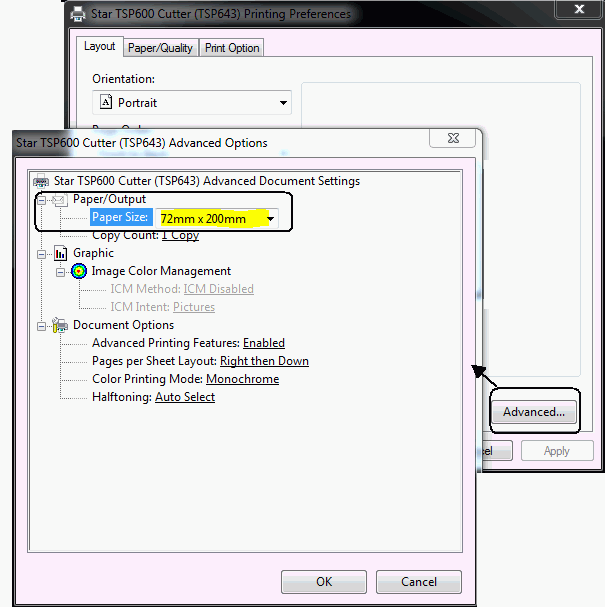
- On the Devices and Printers window, right-click the printer, and select Printing Preferences.
-
Select Advanced.
The Advanced Options window appears.
-
Select Paper/Output > Paper Size: 72mm x 200mm.

- Select OK.
-
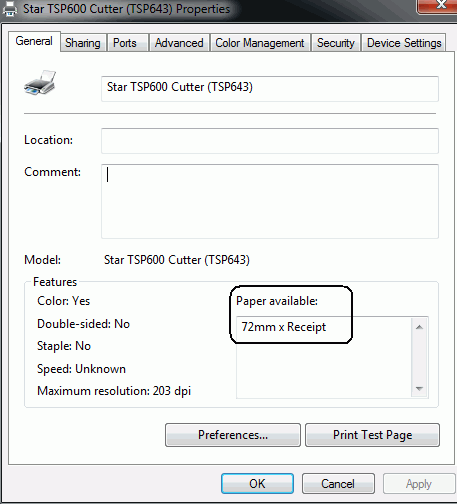
Check the Printer Properties window to see that the correct paper size is listed under Paper available.

Note:
If the printer driver does not list the correct paper size for your printer, create a custom paper size and select it. See Create a Custom Receipt Size (Windows).