Serials Check In
You can use Leap to check in serials, check in parts of standing orders, and predict the next group of issues or parts.
For the permissions needed to check in serials and standing order parts, search the Polaris online help for "Serials Workflow Permissions."
You can check in any issue or part that has a status other than Received, such as:
- Expected
- Pending Claim
- Claimed
- Not Available
- Never Published
To check in issues or parts
- Go to Utilities > Serials Check In.
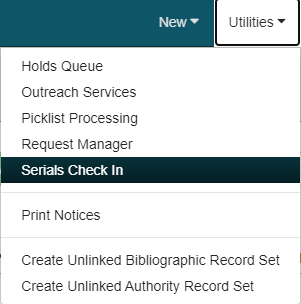
The serials Find Tool opens. - In the Find Tool, type the title of a serial.
- Select a result, and select Open. The Serials Check In workform opens.
- From the Serials Check In workform, you can do any of the following:
Filter by Serials Check In Status
You can filter the Leap Serials Check In table according to issue or part status.
To filter serial issues or parts
- Go to Utilities > Serials Check In.
The Find Tool - Serial Holdings Record page opens. - Type the title of a serial and select the search icon.
A result list appears. - Select a serial title from the result list and select Open.
The Serials Check In page opens.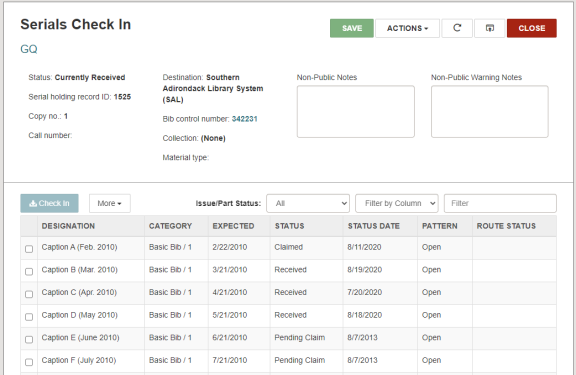
- Select a status from the Issue/Part Status list.
Note:
The default selection and Not Available status can be configured in Polaris Administration. See "Specify the Display of Issues on the Check In Workform" for more details.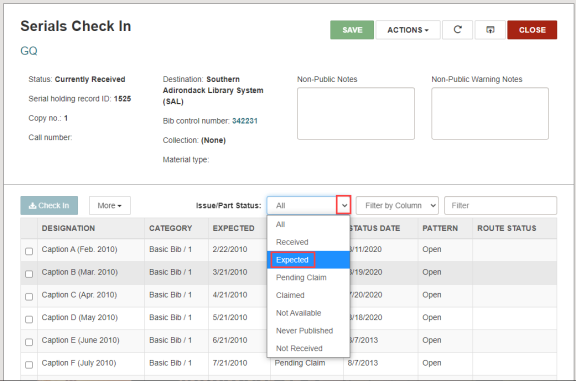
The Serials Check In table shows only the issues or parts with the selected status.
- You can narrow your search further by doing the following:
- Filter by Column to further narrow your results.
- Type a keyword to filter by in the Filter field.
Note:
The Issue/Part Status and Filter by Column work as an "AND" between filters. Set the Issue/Part Status to "All" to use the Filter by Column options only. - Filter by Column to further narrow your results.
Check In Serials or Parts
To check in serials or parts
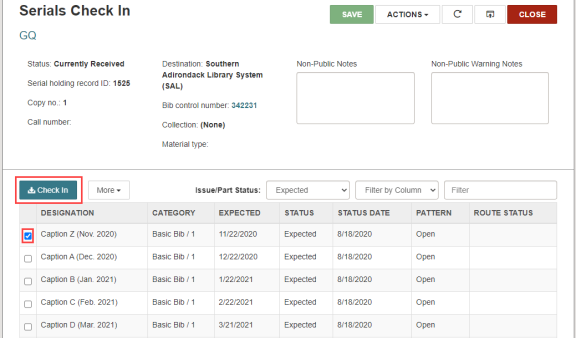
- In the Serials Check In workform, select an issue or part that has a status other than Received.
- Select Check In.
- Depending on the settings in the staff client, you might see one or a number of the following prompts:
- Scan Barcode: If the Serial Holdings Publication Pattern in the staff client is set to Prompt for Barcode, the Create Item for Issue/Part dialog box appears with the Barcode field empty. Scan or type the barcode and select Continue.
- Modify Price: If the Serial Holdings Publication Pattern in the staff client is set to Prompt for Barcode, and the Unit Price is zero, then the Create Item for Issue/Part dialog box appears with the Barcode field empty. Scan or type the barcode and select Continue.
- Item Template error: If the Serial Holdings Publication Pattern in the staff client is set to Generate items at check-in, but there is not a template associated with serials for your branch, you'll see the Item Template error. When you select OK in the error, the check-in is canceled and no item record is generated.
- Print route slip: If the option is available, the Print Route Slip dialog box appears. Select Yes to see the Print dialog box. Select Cancel to continue the check-in without printing the route slip.
- For subscription parts, proceed to the next step.
For serials, a message displays saying the check-in is complete. Proceed to the last step. - For subscription parts, the Create Part Bibliographic Record dialog box opens. Enter text in the required fields and select Continue.
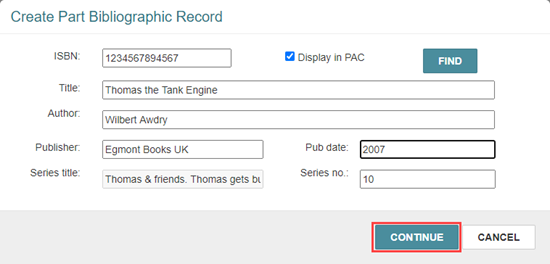
- The Create Part Bibliographic Record dialog box opens. Enter text in the required fields and select Continue.
- When the check-in is complete, the issue or part status changes to Received. Overnight processes update changes to the compressed holdings in PAC.
If you made an error, you can undo the check-in.
Undo a Check-In
To undo a check-in
- In the Serials Check In workform, select an issue or part that has a status of Received.
- Select Undo Check In.
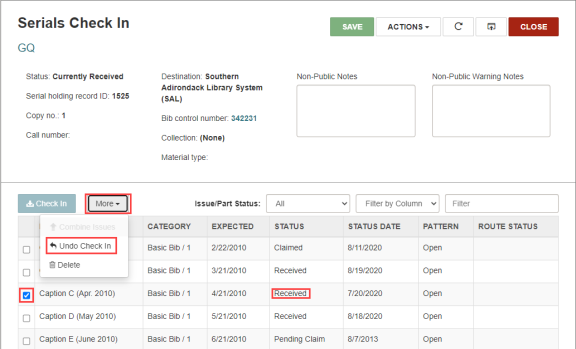
The Status of the selected item returns to the non-received status it had before it was checked in.
Predict the Next Group of Issues or Parts
To predict the next group of issues or parts
- In the Serials Check In workform, go to the Actions menu and select Predict Issues/Parts.

- If there is more than one publication pattern, the Publication Pattern Dialog box opens. Select the publication pattern you want to use to predict future issues.
- Select Continue. A number of issue or part records are added according to the publication pattern. You can edit the publication pattern and the number predicted in the staff client. Search Polaris online help for "Create Publication Pattern - Pattern Options Window" for more information.
Delete Future Issues or Parts
To delete future issues or parts
- In the Serials Check In workform, select an issue or part.
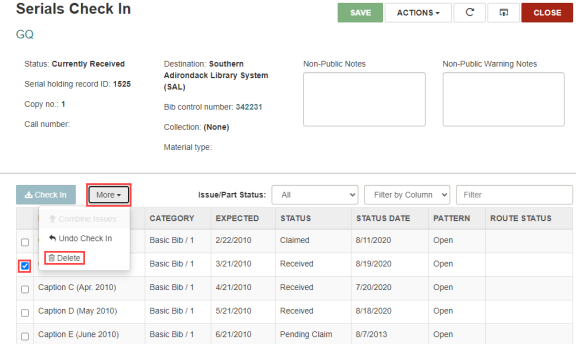
- Select Delete.
- If you delete a part or issue that has a defined retention period in the serial holdings record, the Issue/Part is Retained dialog box appears.
- If you delete a part or issue that is linked to another record, such as a route list or bibliographic record, additional dialog boxes appear.
Note:
You might see one or a number of dialog boxes. Examples include the following:
Combine Serials Issues
You can combine issues of a serial using the Combine Issues button on the Serials Check In workform.
Tip:
If the publication will regularly include this combined issue, modify the publication pattern.
For the permissions needed to work with serials and standing order parts, search the Polaris online help for "Serials Workflow Permissions."
You can combine issues, but not standing-order parts. The two issues must be linked to the same publication pattern to be combined. If they are not linked to the same publication pattern, an error message appears, and the issues are not combined. Issues with the following status also cannot be combined:
- Received
- Claimed
To combine serial issues
-
Go to Utilities > Serials Check In.
The serials Find Tool opens. - In the Find Tool, type the title of a serial.
-
Select a result, and select Open. The Serials Check In workform opens.
-
Select two issues in the issue list by selecting the check boxes to the left of each issue.
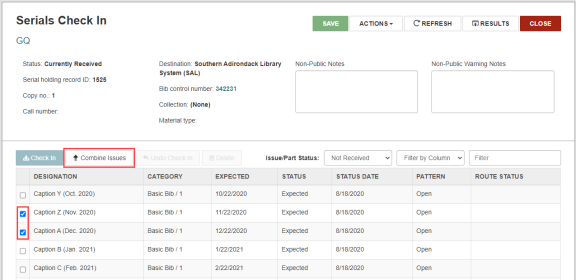
- Select Combine Issues. The Combine Issues dialog box appears.
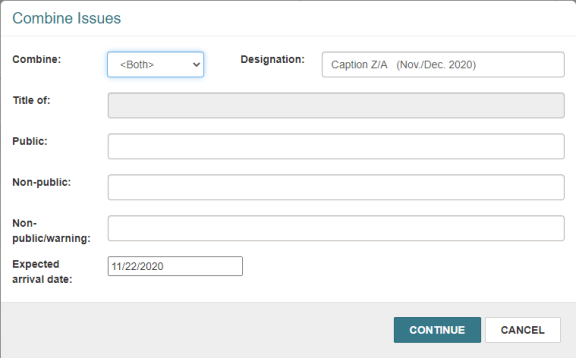
- Select or type information into the fields as described:
- Combine: Select one of the following options:
- Chronology to list the lower of the two volume numbers for the combined issue, and list the expected dates of each issue separated by a slash.
- Enumeration to list the volume numbers of the issues with a slash to separate the two numbers, and list only the first of the expected dates.
- <Both> to list the volume numbers of the issues with a slash to separate the two numbers, and list the expected dates of each issue separated by a slash.
- Designation: Shows the possible volume number and date of the combined issues depending on what option you select in the Combine list. You can change this text if needed.
- Title of: You cannot edit this text.
- Public: Enter an optional public note.
- Non-public: Enter an optional note for staff.
- Non-public/warning: Enter an optional warning for staff.
- Expected arrival date: Defaults to the earliest of the two arrival dates. You can change this date if needed.
- Combine: Select one of the following options:
- Click Continue. A message appears to tell you the issues were combined successfully.
Note:
The new issue has the status of Expected only if both combined issues each had the status of Expected. If the two combined issues have Expected and another status, the combined issue will have the non-Expected status.