Create a Custom Receipt Size (macOS)
To create a custom receipt size on macOS
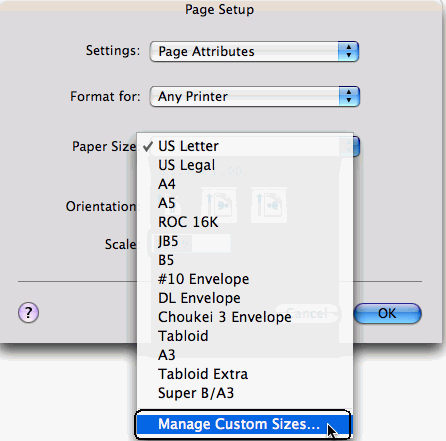
- Select Command+P, or select File > Page Setup, or File > Print to open the Page Setup dialog box.
- Open the drop-down list in the Paper Size box, and choose Manage Custom Sizes.

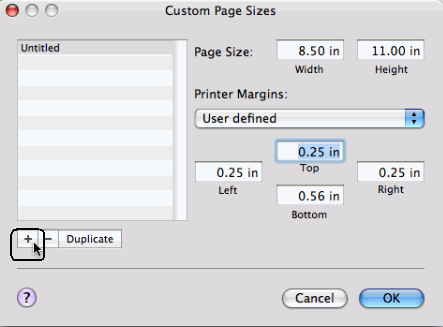
The Custom Page Sizes dialog box appears.

- Select the plus sign button in the bottom left corner of the dialog box.
- Double-click the default name ("Untitled") and type a more descriptive name, such as "No Margins".
- Select OK.
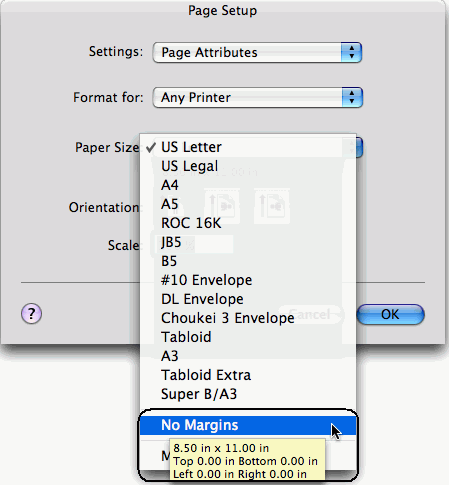
- Select Command+P to open the Page Setup dialog box.
- Click in the Paper Size box to open the drop-down list.
- Select a custom paper size name (for example, No Margins).

- Select OK.