Creating, Copying, Editing, and Deleting Filters
Existing filters can be copied, edited or deleted.
Creating Filters
To create a filter, follow these steps:
- Choose Filters from the menu on the left-hand side of the WebBridge LR home page.
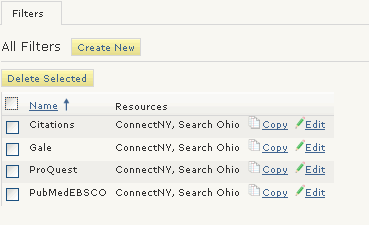
The Filters tab displays:
- Choose the Create New button.
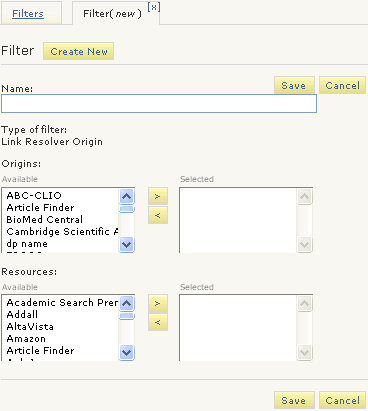
The Filters (new) tab displays:
- Enter a name for the filter in the Name text box.
A maximum of 64 characters can be used in a filter's name. - Move the origins for which a resource will be suppressed from available to selected.
- Choose Save to save the filter.
- Apply the filter to resource definitions by moving the resources from available to selected. You can also apply filters from the resource tab.
When you apply the filter in a resource definition, the resource cannot be accessed from the selected external origins.
Copying Filters
- Choose Filters from the menu on the left-hand side of the WebBridge LR home page.
The Filters tab displays:
- Choose the Copy button associated with the filter.
The Filter (<new>) tab displays data from the copied filter. - Edit the copied data to create a new filter.
- Choose Save.
Editing Filters
- Choose Filters from the menu on the left-hand side of the WebBridge LR home page.
The Filters tab displays:
- Choose the Edit button associated with the filter.
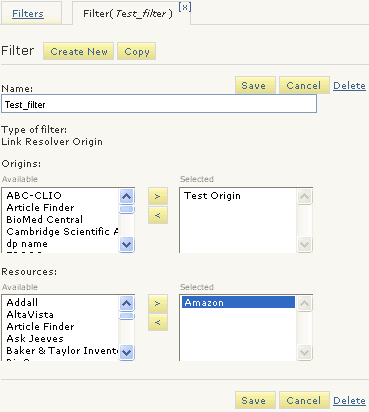
The Filter (<filter_name>) tab displays. For example:
- Edit the filter.
- Choose Save.
Deleting Filters
- Choose Filters from the menu on the left-hand side of the WebBridge LR home page.
The Filters tab displays:
- Select the check boxes for the filters to delete.
- Choose Delete selected.
- Choose Yes.