Set up outreach delivery routes
If you deliver items to outreach services patrons, you can set up delivery routes and specify stops along the routes. To set up outreach delivery routes:
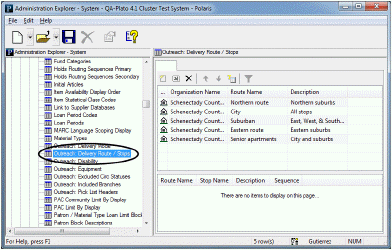
- In the Administration Explorer tree view, open the Policy Tables folder for the organization, and select Outreach: Delivery Route/Stops. The Outreach Delivery Route/Stops table is displayed in the details view.

- To add a delivery route, follow these steps:
- Click
 with no existing route selected. The Insert Delivery Route dialog box appears.

- Select the branch in the Organization Name box.
Note:
If the Outreach Delivery Route policy table is opened at the branch level, only the branch name is displayed in the Organization list.
- Type a name for the route in the Route Name box.
- Type a brief note or description of the route in the Description box.
- Click OK. The Outreach Delivery Route table is displayed with the new entry in the upper part of the table.
- Select File > Save.
- To add stops to a delivery route, follow these steps:
Note:
Each stop you specify will appear as a selectable option for the route in the Patron Delivery Options dialog box (Patron Status workform - Reader Services view).
- In the upper part of the table, select the route you want to modify. In the lower part of the table, one stop is listed for the route by default.
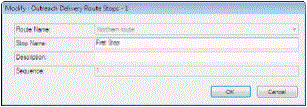
- To modify the name and description of the default stop, select the stop in the lower part of the table and click
 . The Modify Delivery Route Stops dialog box appears.

- Type the name and description (optional) for the first stop, and click OK.
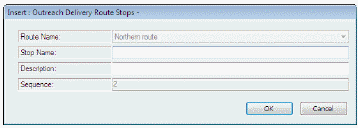
- To add new stops to the route, select any line in the lower part of the table, and click
 . The Insert Delivery Route Stops dialog box appears.

- Type the name and description (optional) for the new stop, and click OK.
- Type a brief note or description of the stop in the Description box.
- Click OK. The Outreach Delivery Route table is displayed with the new entry in the bottom part of the table. The status bar indicates that the modification is pending.
- Continue to add stops to the route by repeating steps d-g.
- To adjust the order of stops on a route, follow these steps:
- Select the route in the upper part of the table. The stops for the route are listed in the lower part of the table.
- Select a stop and click
 or
or  to move the stop earlier or later in the stop sequence.
- Select File > Save to save your changes.
Related Information
- Modify a table entry - To modify a route, select an entry in the top portion of the table and click
 . To modify a stop along a route, select the route, then select the stop in the bottom portion of the table and click
  .
. - Delete a table entry - You can delete an entry only if it is not being used in a current patron record. Select the entry and click
 .
.