Set hold slip options
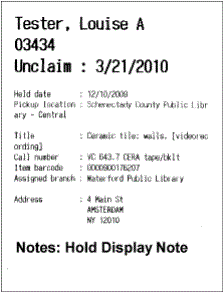
Hold slips always display pickup location, date the item was trapped An item is said to be trapped for a hold when an item that fills a request is scanned at circulation and the system links the item to a specific request, either automatically or by displaying a message that prompts you for a decision. for the hold, held till (unclaimed) date, item title, item call number, item barcode, any display notes (in bold), and item’s assigned branch. You can add any of these options to print on a hold slip:
- Patron name (if selected, this is printed in bold at the top of the slip)
- Last 5 digits of the patron barcode (Limited patron barcode)
- Patron phone (all phone numbers from the patron record)
- Patron address (home address from the patron record if available, otherwise the first available address in the patron record)
- Notification method
- Patron e-mail address
- Any user-defined fields from the patron record
Note:
If you add any user-defined fields and enable hold call slips (see Enable hold call slips), the fields you specified appear on the hold call slip.
The illustration shows an example.

To select additional information to appear on hold slips.
Note:
You can set hold slip, hold call slip, and hold pickup slip parameters on the system, library, or branch level. For details about these slips, see Setting Up Circulation Receipts.
- In the Administration Explorer tree view, open the Parameters folder for the organization, and select the Patron Services tabbed page in the details view.
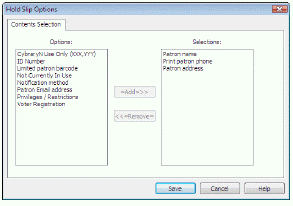
- Double-click Hold slip options. The Hold Slip Options dialog box appears.

- To print additional fields on the hold slip, select the field in the Options list and click Add. The field is placed in the Selections list. (To remove a field from the hold slip, select the field in the Selections list, and click Remove. The field is placed in the Options list.)
- Click Save on the dialog box.