Set up the Payments Gateway SWP account
Your library establishes a merchant account with Payments Gateway directly. You can set up one Payments Gateway SWP account for each branch that will offer credit card processing, or set up one account for your entire system, associated with a specific library administrator. To set up a Payments Gateway SWP account.
- Go to http://www.paymentsgateway.com/home.aspx
and follow the instructions to set up a SWP merchant account. - Log in to Payments Gateway Virtual Terminal (VT) with your SWP Merchant ID, username, and password at
https://www.paymentsgateway.net/vt3/login.aspx - On the Payments Gateway VT page, select Gateway Settings, Gateway Key.
- Generate the API Login ID and the Secure Transaction Key.
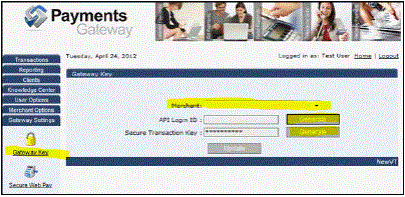
Record these values for use in Polaris Administration. See Set up Payments Gateway processing in Polaris Administration.
- Click Update.
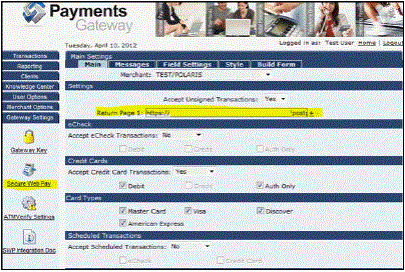
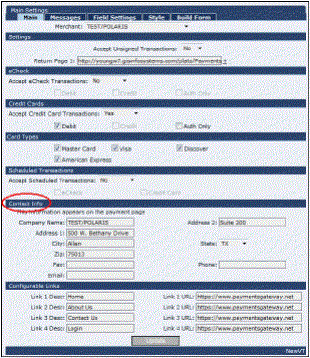
- Select Gateway Settings, Secure Web Pay.
- Click the Main tab if it is not already selected.
- In the Return Page 1 field, enter the post-back URL for your site:
https://www.mylibrary.org/polaris/Payments/PostbackPaymentsGateway.aspx, where
www.mylibrary.org/polaris is your PAC web site. (Both PowerPAC and Mobile PAC use the same post-back URL.)
Important:
Payments Gateway does not accept hyphens in the post-back URL (Return Page 1).
You will enter the same URL in Polaris Administration. See Set up Payments Gateway processing in Polaris Administration.
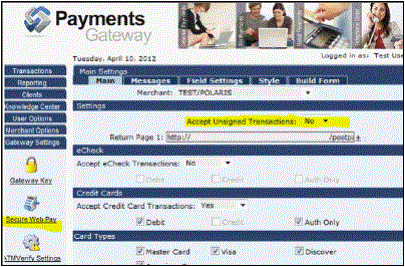
- Set Accept Unsigned Transactions to No.
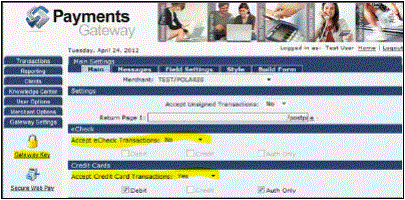
- Set Accept eCheck to No, and set Accept Credit Card Transactions to Yes.
- In the Contact Info section, supply the information that should appear on the Hosted Checkout page.
- Click Update.
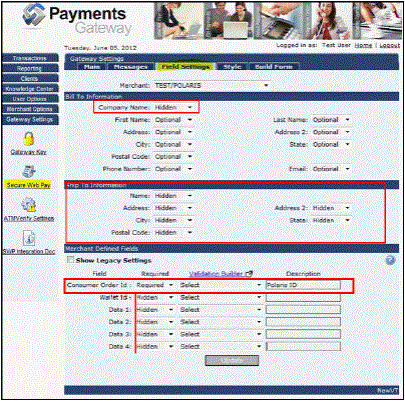
- Click the Field Settings tab and make the following settings:
- Bill To Information settings are recommended.
- Ship To Information - We recommend that you set these fields to Hidden.
- Merchant Defined Fields - Consumer order ID - Displays the order ID on Payments Gateway reports, necessary for identifying transactions (set to Required). When this option is set to required, the order ID is also displayed on the Hosted Checkout page. You can type a description that will make sense to the patron; for example, Polaris Payment ID. Set the other Merchant Defined Fields to Hidden.
- Click Update.