Creating a Non-Integrated eContent Vendor Account
To create a non-integrated eContent vendor account:
- Select the Vendor node in the Administration Explorer.
- Select the Overdrive (non-integrated) or Generic (non-integrated) vendor, right-click, and select New.
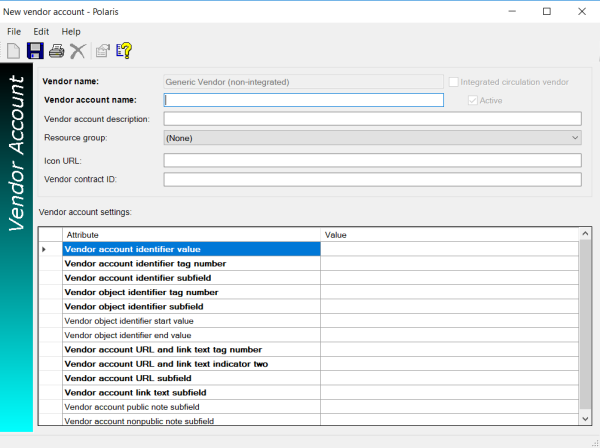
The Vendor Account workform for the non-integrated eContent vendor opens.
Note:
The Vendor name field is filled in automatically with OverDrive, Inc. if you are creating a vendor account for OverDrive, or Generic Vendor if you are creating an account for another vendor.
- Type a name for the vendor account in the Vendor account name box and an optional description in the Vendor account description box.
Note:
The following fields are required for non-integrated eContent vendor accounts: Vendor account name, Vendor account identifier value, Vendor account identifier tag number, Vendor account identifier subfield, Vendor account URL and link text tag number, Vendor account URL and link text indicator two, Vendor account URL subfield, and Vendor account link text subfield.
- To limit patron access, select the resource group from the Resource group drop-down list box.
Note:
The resource group must be set up in Polaris Administration before it appears in the list. For information on setting up resource groups in Polaris, see Polaris staff client online Help.
- To display the vendor’s icon next to the URL link in the PAC, enter the URL for the vendor’s icon in the Icon URL box.
- Type the contract ID in the Vendor contract ID box. The contract ID is optional for non-integrated vendors.
- In the Vendor account settings, enter the following information:
Note:
If you are creating a vendor account for OverDrive, some recommended account settings are pre-filled.
- Vendor account identifier value - (required) Identifies the vendor’s account.
- Vendor account identifier tag number - (required) Identifies the bib tag where the vendor account ID is located.
- Vendor account identifier subfield - (required) Identifies the bib tag subfield where the vendor account identifier is found.
- Vendor object identifier tag number - (required) Identifies the tag where the eContent object identifier is found.
- Vendor object identifier subfield - (required) Identifies the tag subfield where the eContent object identifier is found.
- Vendor object identifier start value - Specifies where the string that identifies the eContent object starts.
- Vendor object identifier end value - Specifies where the string that identifies the eContent object ends. If the object identifier appears at the end of the subfield, this field can be left blank.
Note:
If both the object identifier start and end values are left blank, the entire subfield is included.
- Vendor account URL and link text tag number (required) - Identifies the tag where the URL for the eContent and link text are found. These need to be in the same tag. This is the tag that becomes the resource entity for the non-integrated eContent bibliographic record.
- Vendor account URL and link text indicator two (required) - Identifies the MARC second indicator value for the tag containing the URL and link text.
- Vendor account URL subfield (required) - Identifies the subfield where the URL is located.
- Vendor account link text subfield (required) - Identifies the subfield where the link text is located.
- Vendor account public note subfield - Identifies the subfield for the public note.
- Vendor account nonpublic note subfield - Identifies the non-public note subfield.
- Save the Vendor Account workform for the non-integrated vendor account.
Resources Entities for Non-Integrated EContent Vendors
Resource entities are used for non-integrated eContent vendors when the library wants to restrict access to eContent by the branch or branches that have a certain contract with the non-integrated eContent vendor. They must be unique for the vendor account ID/URL within one bibliographic record.