Copy a Polaris Read-Only Import Profile
You can start with an existing Polaris read-only import profile and copy it. See Polaris Read-Only Import Profiles for a list of the Polaris import profiles and their intended purpose. The advantage to starting with one of these existing profiles is that they are already set up to handle duplicate detection, overlay, and other processing. You can rename the profile to make it more descriptive and make slight changes without affecting the overall efficiency of the automatic processing. For information on the permissions required for creating and modifying import profiles,
Tip:
You can print an import profile and review all the settings. See Print an import profile.
To create a new import profile from an existing Polaris read-only profile:
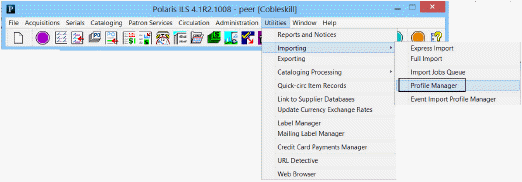
- Select Utilities > Importing > Profile Manager from the Polaris Shortcut Bar.

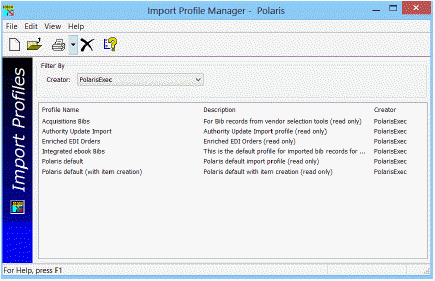
The Import Profile Manager appears.
- In the Creator box, select PolarisExec to limit the view to only the Polaris read-only profiles.

- Select the read-only Polaris import profile you want to copy, right-click, and select Copy.
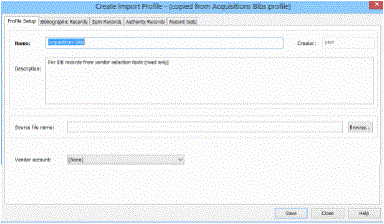
The Create Import profile window appears with the name of the profile you copied.

- Type a name for the profile in the Name box, and an optional description in the Description box.
Tip:
Name the profile so it is easy for users to identify, for example, LSSIAuthority or OCLCBibliographic. If you are copying the Acquisitions Bibs or Enriched EDI Orders profile, name the profile with the vendor’s name, for example Baker & Taylor.
- (Optional) Click Browse and go to a specific file if you want to save the file name in the profile, or go to a directory if you want to save the directory location in the profile. If the file name is saved in the profile, the file will be selected automatically (if it exists) when a cataloger imports records using this profile. If a directory is saved in the profile, the directory location automatically displays when a cataloger clicks the Add button to add the files to be imported.
The file name or directory location appear in the Source file name box.
- Click Save.
The profile is saved. The Create Import Profile window remains open.
- If you need to make changes to the import profile, click the following tabs and set the import options:
- Bibliographic Records - See Set import options for bibliographic records.
- Item Records - See Set import options for item records.
- Authority Records - See Set import options for authority records.
- Record Sets - See Set import options for record sets .
- When you have finished setting up the relevant import options, click Save, and click Close to close the saved profile.