Edit a bibliographic entity definition
At the system level, you can edit the definitions (tags, indicators, subfields) of many bibliographic information display entities. However, the following system-defined entities cannot be edited:
|
Bibliographic call number |
Fiction |
|
Primary title |
Hold Request Count |
|
Primary author |
Holdings Note |
|
Snippet [the brief text string that shows the search terms in context] |
Local Availability (Available Local Item Count and Total Local Item Count) |
|
System Availability (Available System Item Count and Total System Item Count) |
OCLC Control Number |
|
Holdings Statement |
Publication year |
|
Available Local item Count |
Retention Statement |
|
Available System Item Count |
Total Local Item Count |
|
Control Number |
Total System Item Count |
|
Course Reserve Count |
Type of Material |
Also note that certain fields are ordinarily displayed as hyperlinks leading to a browse search in PowerPAC (for example, author or subject). However, adding a tag to a materialization rule for that type of data does not automatically cause the field to be displayed as a hyperlink (that is, it is not added to the browse index). The hyperlink will only occur if the tags, indicator values, and subfields selected for inclusion in the display correspond exactly to the fields that are already included in the browse index.
To edit existing entities for display in PAC search results:
Note:
You need the permission Modify and create display entities: Allow to do this procedure.
- In the Administration Explorer tree view, open the Profiles folder for the system, and click the PowerPAC tab in the details view.
- Double-click Title Display: Configure. The Title Display: Configure dialog box opens.
- Right-click the entity in the Available entities list and select Properties from the context menu.
Note:
To display an entity for selection, you may need to click the Browse icon ![]() at the top of the Available entities list. Select the entity in the Browse Entities dialog box and click Reveal to add the entity to the Available entities list.
at the top of the Available entities list. Select the entity in the Browse Entities dialog box and click Reveal to add the entity to the Available entities list.
- On the Entity Properties dialog box, click Define Entity. The Entity Definition dialog box opens.
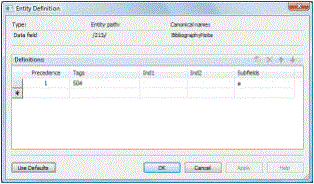
- To add a new tag to the entity, click the ellipsis button in the Tags column.
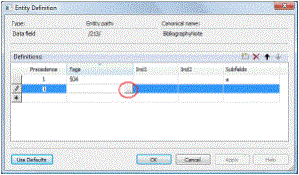
The Tag Picker dialog box opens.
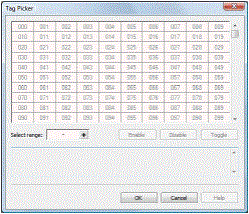
- Select a tag or multiple tags:
- To select one tag, click it in the grid, and then click Enable.
- To select a contiguous range of tags, enter the beginning and ending tags in the Select range box, and click the + button to highlight the tags in the grid. Then click Enable.
- To select a non-contiguous set of tags, press CTRL+click to select the tags in the grid, and then click Enable.
- To save your changes and close the dialog box, click OK. The Entity Definition dialog box is displayed.
- To select indicator values, click the ellipsis button in the Ind1 or Ind2 column.
The Code Picker dialog box opens.
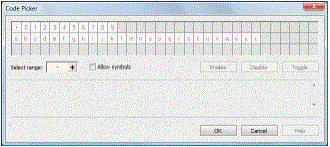
- Select an indicator value or multiple indicator values:
- To select an indicator value, click it in the grid, and then click Enable.
Note:
The dot character in the upper left corner of the Code Picker grid indicates a space.
- To select a contiguous range of indicator values, enter the beginning and ending values in the Select range box, and click the + button to highlight the values in the grid. Then click Enable.
- To select a non-contiguous set of values, press CTRL+click to select the values in the grid, and then click Enable.
- To save your changes and close the Code Picker dialog box, click OK. The Entity Definition dialog box is displayed.
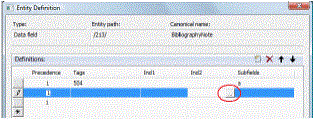
- To select subfields, click the ellipsis button in the Subfields column to display the Code Picker dialog box, and follow the same steps you used to select the indicator values. See step 8.
- When all the tags, indicators and subfields are defined for the entity, click Apply to permanently save your work and keep the Entity Definition dialog open, or click OK to permanently save your work and close the dialog box.
Use the Change Labels dialog box to edit labels. See Select bibliographic entities for display and edit labels.