Import Axis 360 eContent Bibs Downloaded from TS3
To set up the import profile for importing the Axis 360 eContent bibs downloaded from TS3 and enable integration with Polaris:
Note:
Once you have set up the import profile and saved it (step 1), any staff member with the appropriate Polaris permissions can select it for subsequent imports of Axis 360 records downloaded from TS3.
- Create an import profile specifically for importing Axis 360 bibs downloaded from TS3:
Note:
For general information about creating, copying, and modifying import profiles, see Setting Up Import Profiles and Importing Records.
- Create a new, blank import profile or start with a PolarisExec import profile and copy it.
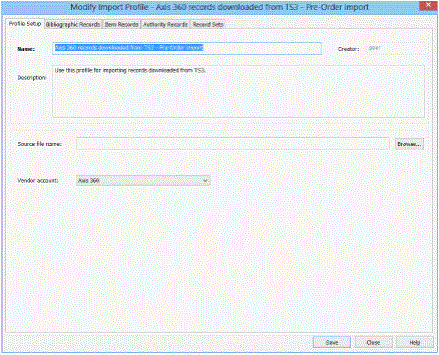
- On the Profile Setup tab, type a name for the import profile, select the Axis 360 vendor account in the Vendor account drop-down list box, and click Save to save the import profile.

- Select the Bibliographic Records tab and select or modify the options. Work with your Polaris site manager to determine the settings appropriate for your library. See Examples of Settings for TS3 Imports
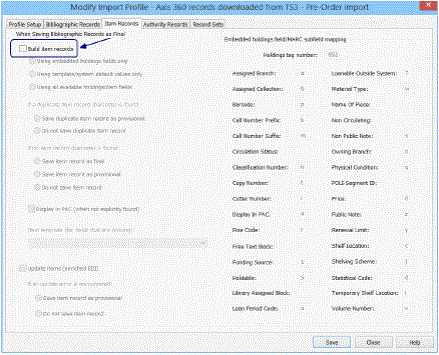
- Select the Item Records tab and clear the Build item records check box.
(EContent item records will be built by the overnight sync process once the titles have been ordered.)
 .
.
- (Optional) Select the Authority Records tab, and modify the settings.
- (Optional) Select the Record Set tab, and modify the settings.
- Save the import profile.
The import profile is ready for any staff member with the appropriate permissions to select when importing pre-order Axis 360 eContent records from TS3.
- Select Utilities > Importing > Express Import or Full Import.
- Select the import profile created for importing Axis 360 records from TS3.
- Click Add and select the file of Axis 360 eContent bibliographic records downloaded from TS3.
- Click Import.
The import job is added to the import queue. See Axis 360 Import Jobs . Once the import processing is complete, the Axis 360 eContent records are integrated with Polaris.
If your library follows this workflow, the imported records can be bulk-added to create the purchase order and the order can be sent to Baker & Taylor via EDI. See
When releasing the purchase order, the Display in PAC option can be selected so that patrons can place holds on these on-order titles.
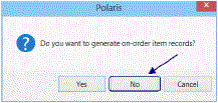
However, on-order items must not be created when the purchase order is released because the eContent item records are created by the overnight sync process when the titles have been purchased. When releasing an order for Axis 360, select No when the dialog box asks if you want to create on-order items.

Later, the library can import the full MARC records to overlay these “placeholder” bibs, while retaining the resource entities that enable the integration with Polaris. See Overlaying Axis 360 EContent Bibs.
Examples of Settings for TS3 Imports
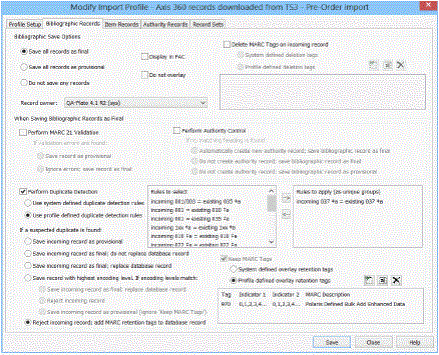
The following are examples of settings on the import profile’s Bibliographic Record tab to support a specific workflow. Your library may choose other options for importing TS3 pre-order bibs.
Display in PAC box is unchecked because the library opts to display these records only after the purchase order is released.
Perform MARC Validation and Perform Authority Control boxes are unchecked because the records are not yet fully cataloged.
Perform Duplicate Detection and Use profile defined duplicate detection rules are selected. The profile-defined rule is incoming 037$a = existing 037$a. If the incoming records include added copies, they are detected based on this rule.
Reject incoming record; add MARC retention tags to database record is selected for processing suspected duplicate bibs. Keep MARC tags is selected automatically.
Profile defined overlay retention tags is selected, and the 970 tag and indicators are the tags to retain. This allows the ordering data for added copies to be retained in the database record.
