Generate and Print Notices
To generate and print overdue, billing, hold, fine, combined, or claims notices
- Select Utilities > Print Notices.
The Notices workform appears.

Note:
Mailers in various formats for combined notices are listed individually on the Notices workform. Overdue notices, billing notices, and patron billing statements are in the Overdues folder. -
Do one of the following:
- To print claim notices, select Claims.
- To print fine notices, select Fines.
- To print hold notices, select Holds.
- To print overdue notices or billing notices, select Overdues.
- To print combined notices, select one of the combined notice formats:
- Combined Notice Full Page Mail
- Combined Notice Half Page Mail
- Combined Notice Z Fold Mailer
If you selected Fines, Holds, or Overdues, the appropriate notices appear.
If you selected a combined notice format, the Report Wizard appears. Skip to step 4.
-
Select a notice format:
- Full Page Mailer - 8.5 x 11 inches
- Half Page Mailer - 9 x 5.5 inches, suitable for commonly available half-page mailer stock
- Post Card - 6 x 4 inches
- Z Fold Mailer - 8.5 x 11 inches, folds so addresses are exposed in window envelope
- Z Fold Mailer Oversized - 8.5 x 14 inches, folds so addresses are exposed in window envelope
Note:
The following notice formats are designed to be inserted in a standard #10 window envelope: Full Page Mailer, Z Fold Mailer, and Z Fold Mailer Oversized.The Report Wizard appears.
-
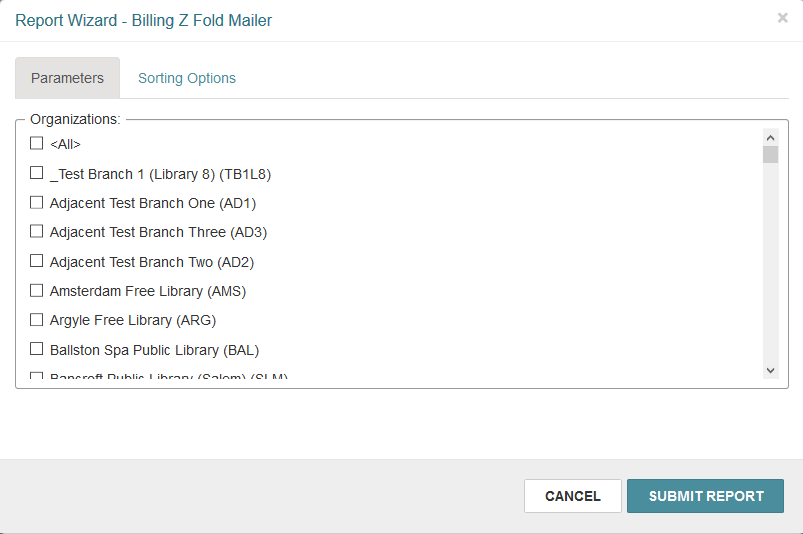
On the Parameters tab, select the organization(s) for which you want to generate notices.
Note:
The organizations that are available for selection are set in the Report server profile. For more information, see "Report Server Set Up Dialog Box" in the Polaris Administration help. -
Select Sorting Options.
The Sorting Options tab appears.
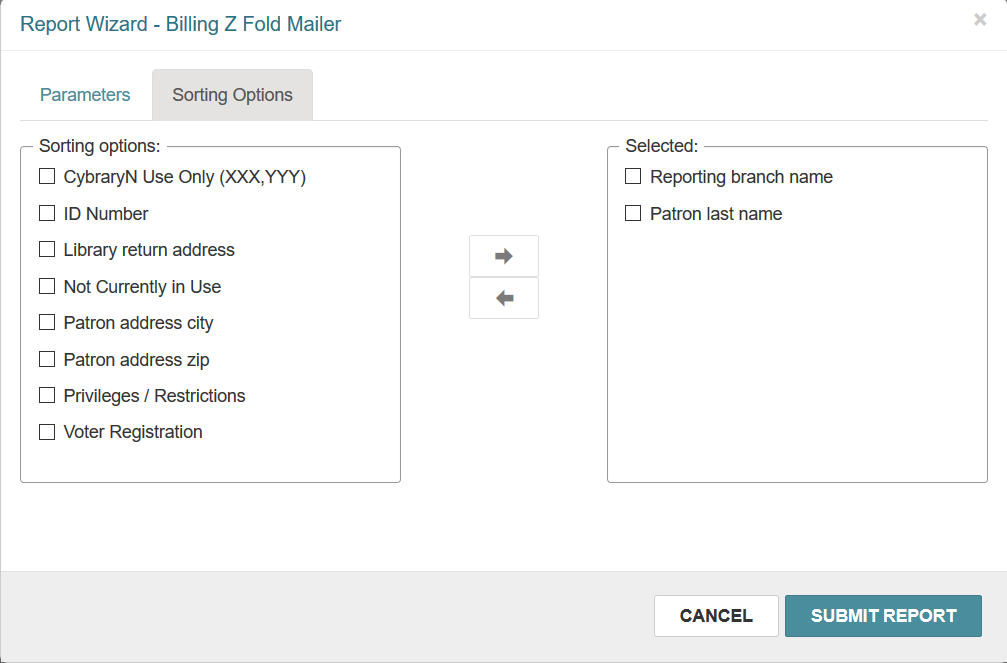
Note:
Your system's user-defined fields for patron records are included in the sorting options. -
(Optional) Select one or more options from the Sorting options list, and select the right arrow button.
The sorting options are moved to the Selected list, indicating that they will be used for sorting notices.
The Selected list must contain at least one sorting option. If you select more than one sorting option, the option at the top of the Selected list is the primary sort criterion, the second option in the list is the secondary sort criterion, and so on.
Note:
Reporting branch name appears in the Selected list by default. If your library or system does not do central notice processing, you might want to use this default setting and select additional sorting fields, as needed. If you do central processing, you might want to remove Reporting branch name from the Selected list and instead select a more useful primary sort for mailing (for example, Patron address zip). -
Select Submit Report.
Leap generates notices and displays them in a preview window. This might take a few moments. A Post Notice message also appears.
-
Review the notices in the preview window.
Note:
If you see problems or decide not to print the notices, close the preview window. -
To print notices, select the printer icon on the preview window. You can also print the notices after posting them to the database (see the next step for more information).
Tip:
You can print a limited range of pages to test the notices. Note that by design, title and author information is limited to 100 characters on all notices. - On the Post Notice message, do one of the following:
Select Yes to post notices to the database.
Important:
When you select Yes, notices are posted (recorded) in the database as issued, and the appropriate queue is cleared for the notice type and organization.- Select No to proceed without posting notices to the database.
Related Information
-
Customizing notice text - The default fine notice text for both mailed and emailed notices is: "Our records show an outstanding fine balance on your account. Please contact the library as soon as possible to resolve these fines."
You can use the WebAdmin tool to change the notice text. The mnemonics are as follows:
-
Printed and mailed notices: NT_FINE_M_TEXT
-
Emailed notices: NT_FINE_EM_TEXT
-
- Printing Acquisitions notices - See "Canceling Orders" and "Claiming" in the Polaris staff client help.
- Printing the Collection Agency Synchronization Report - See "Collection Processing Reports" in the Polaris staff client help.
- Printing notices in Chinese, Korean, or Japanese - If notices in these languages are not printed correctly, you might need to install a different printer driver. Check your printer documentation for more information.